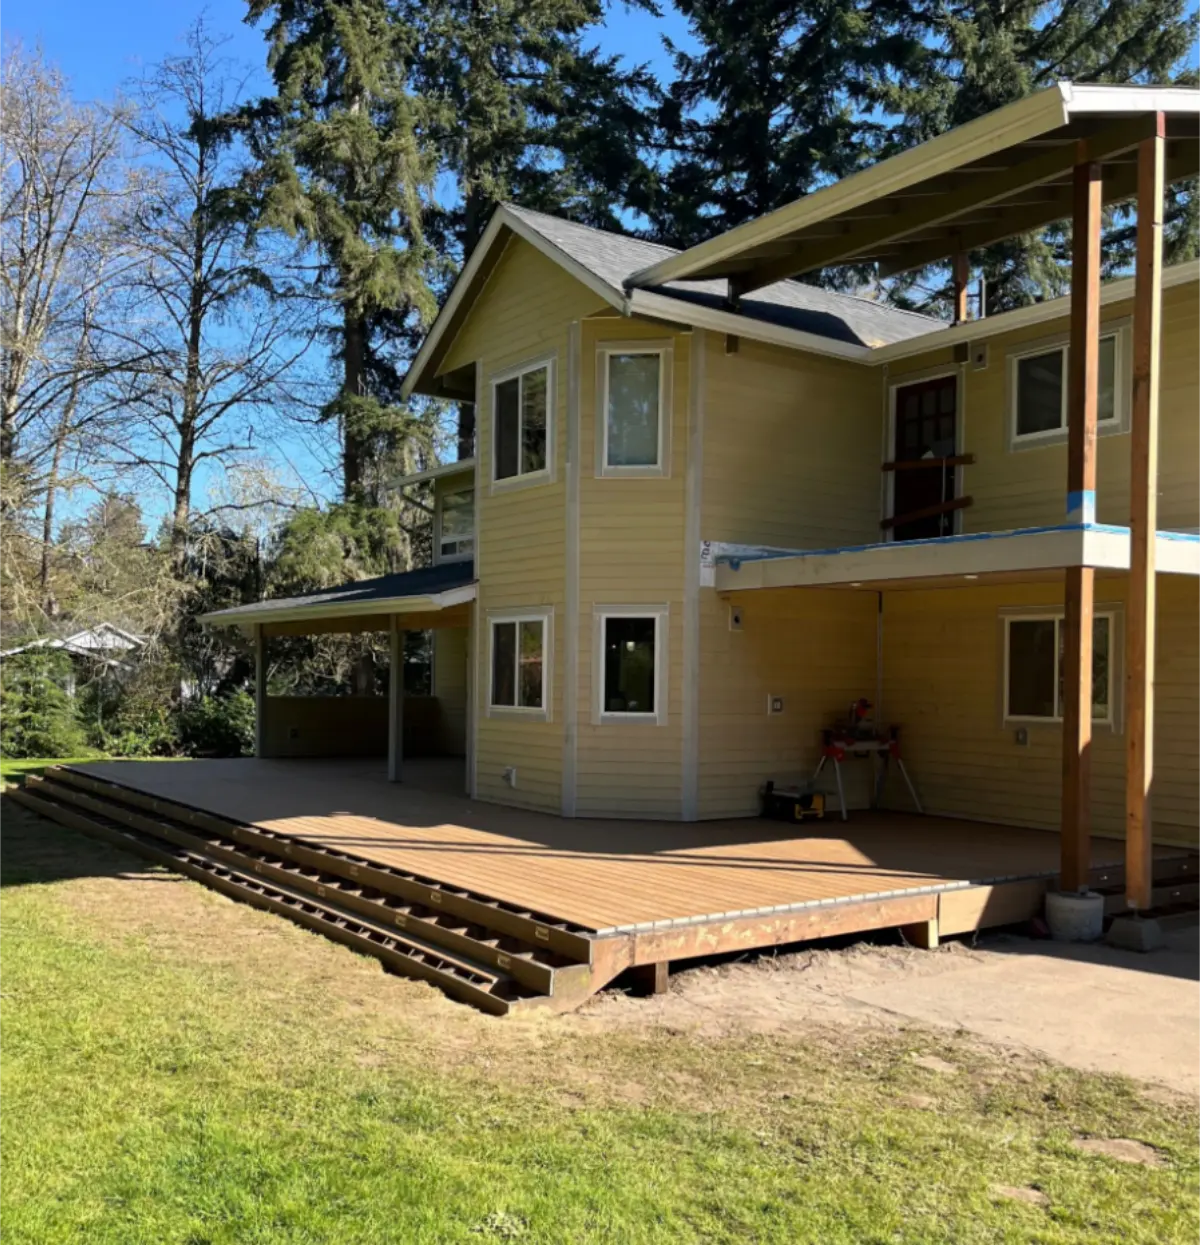
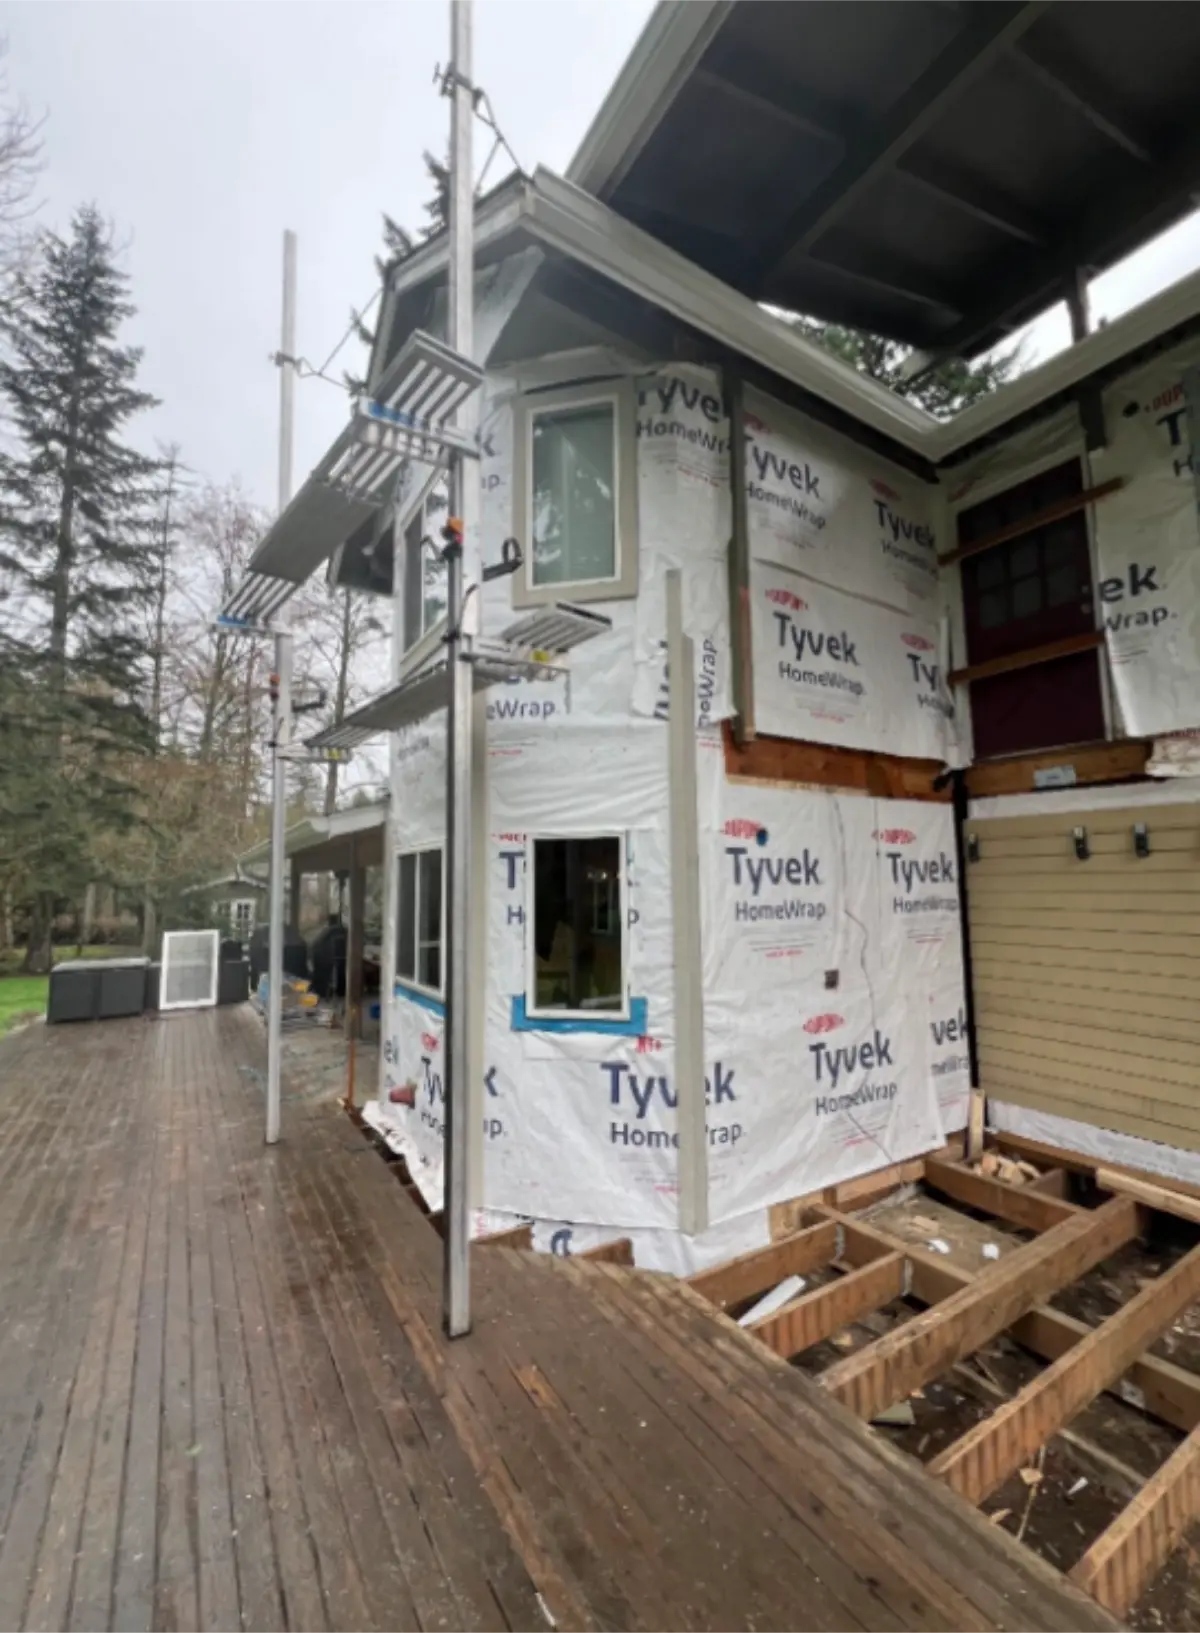
Andrew's Snohomish home looked normal from the outside. The siding appeared intact, and there were no obvious signs of rot from the finished exterior. A few exterior areas felt soft, but the real problem was hidden inside a load-bearing corner wall. Once the rot was discovered, Andrew called GotRot. His request was straightforward: “We found hidden rot in a load-bearing external corner wall. We need the corner replaced properly.”
The house was built in 1980, so we were dealing with an exterior assembly that had already spent more than four decades through Western Washington rain. Our assessment found significant deterioration in the structural corner, along with rotted joists and a deteriorated deck. The evidence pointed to long-term moisture intrusion associated with inadequate flashing. Andrew planned to stay in the house long term. He wanted to address the connected exterior work at the same time rather than revisit the same areas later. The job grew from structural rot repair into a broader exterior renovation that included framing, siding, deck reconstruction, waterproofing, and related electrical work.
The original approved estimate was $44,925.24. The final project total after the broader scope was $72,307.10.
The House Looked Fine Until the Hidden Corner Rot Was Found
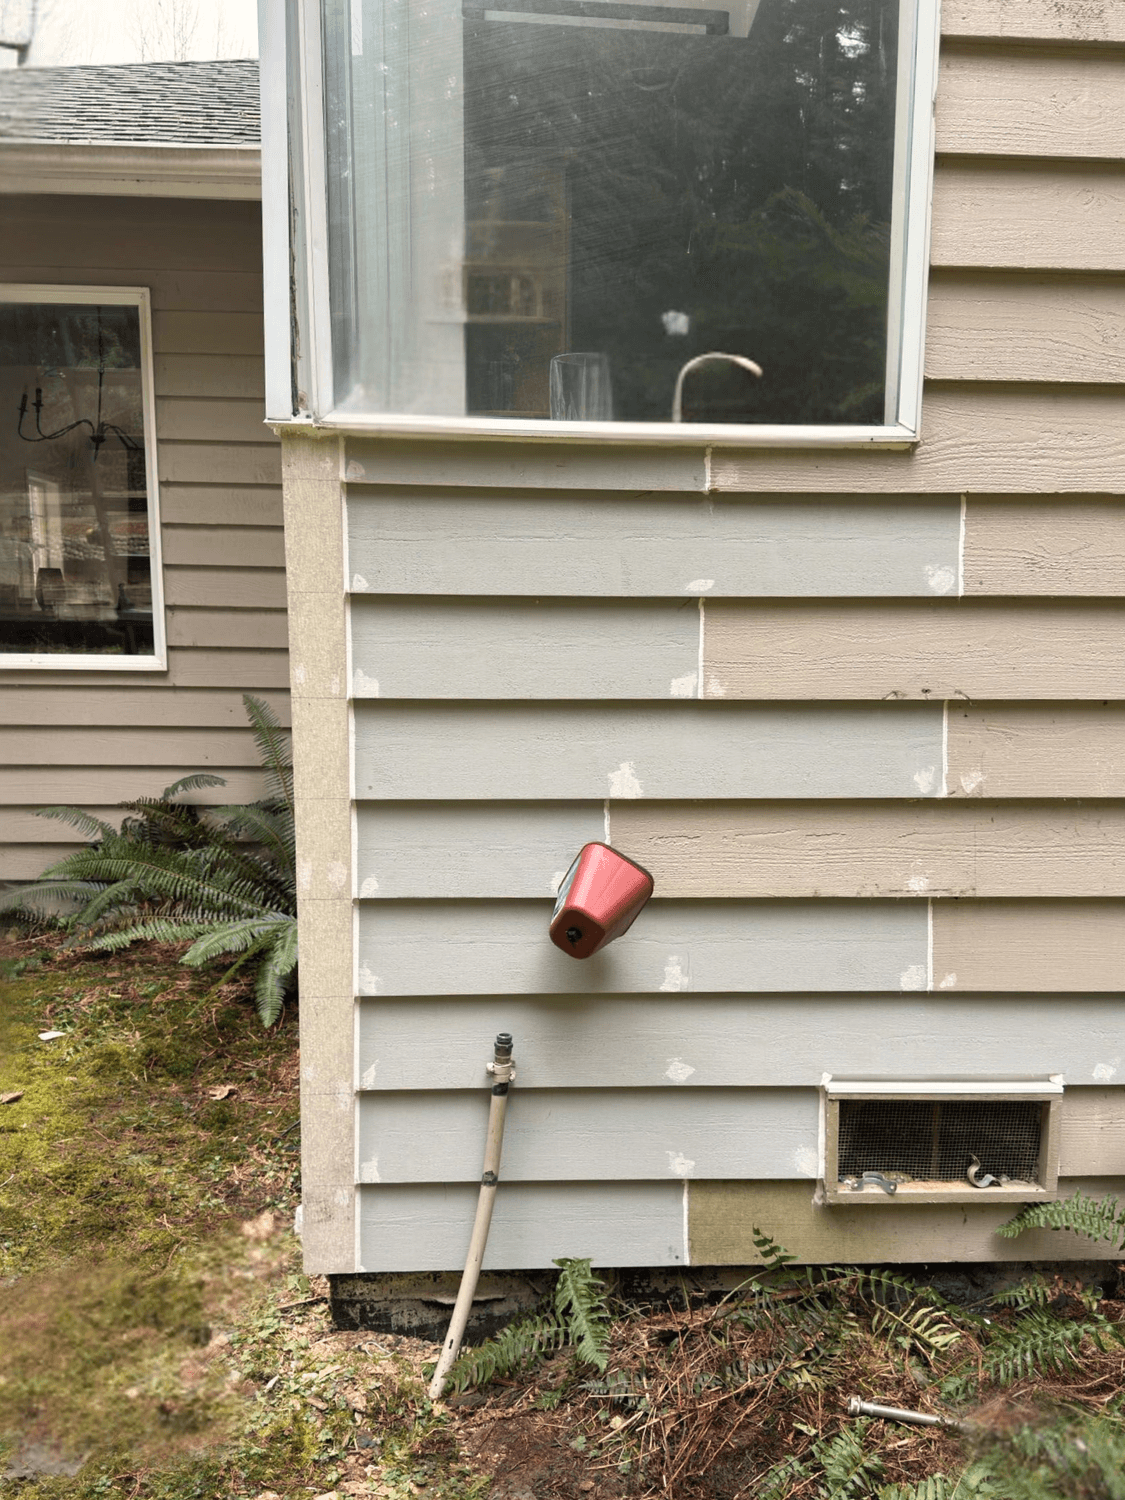
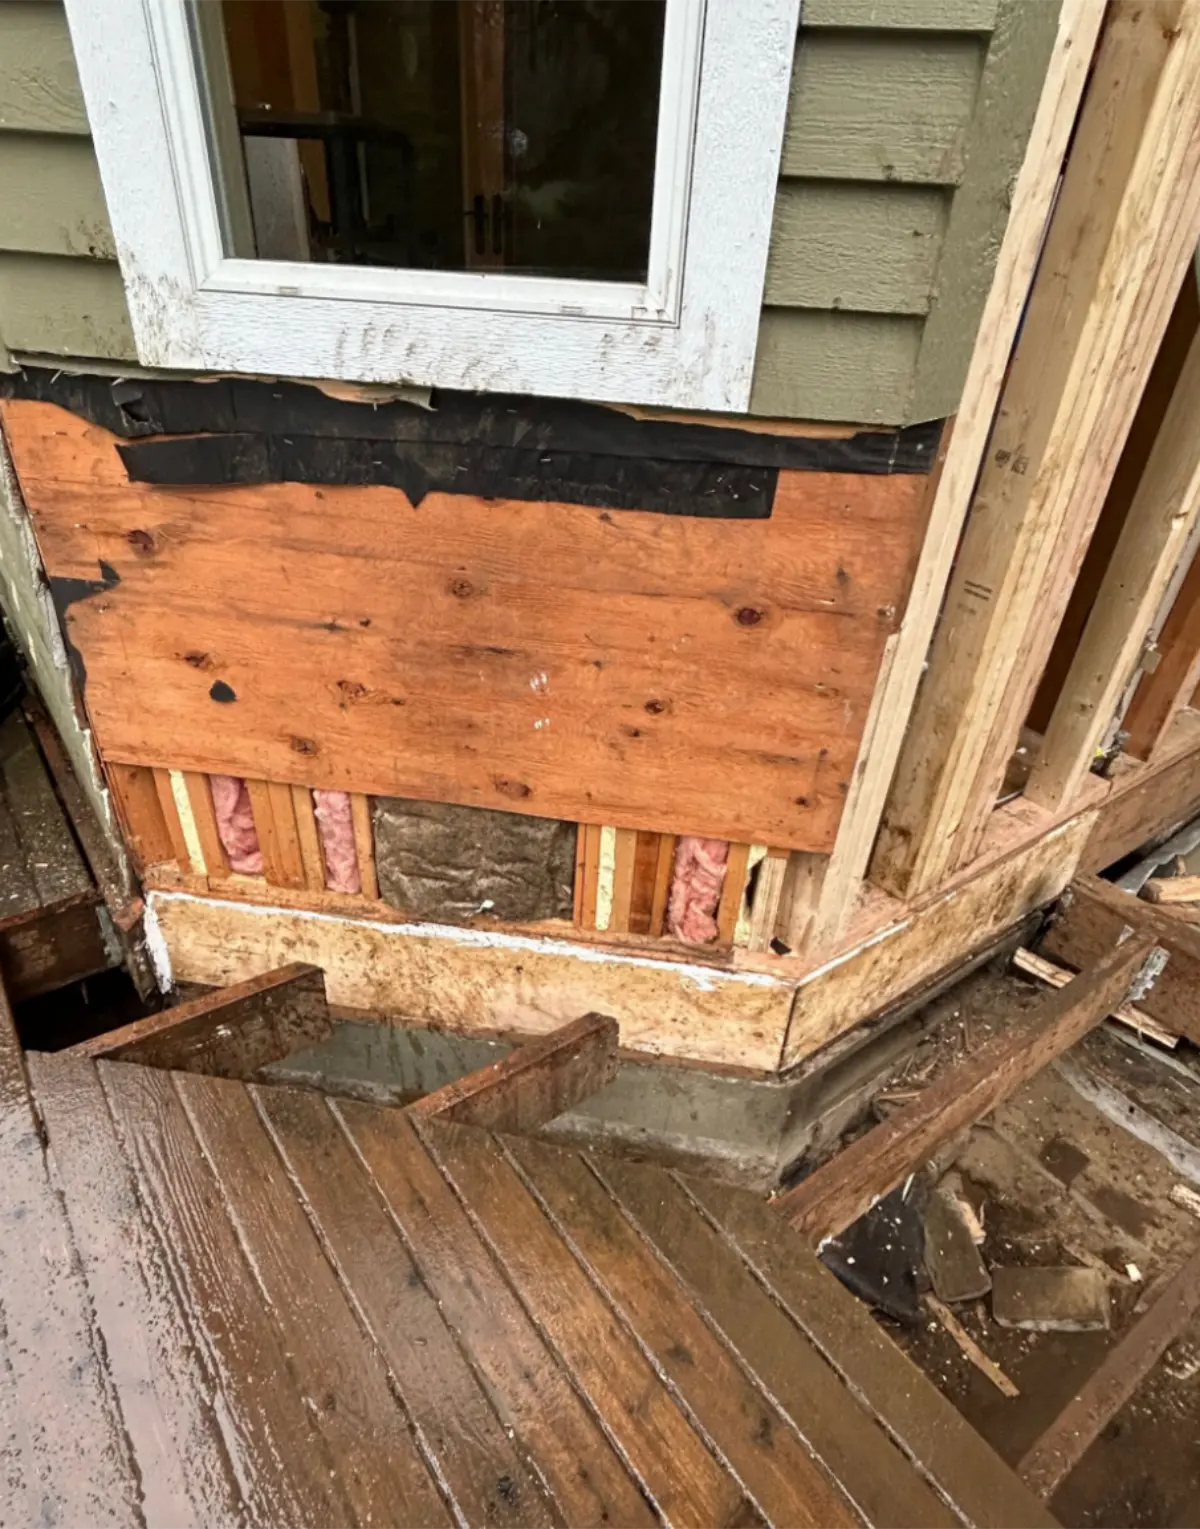
Andrew did not call because of an obvious exterior failure. The exterior looked reasonably normal. Some sections felt soft, but there was no obvious indication from the finished surface that a load-bearing corner had deteriorated behind it. The framing told a different story once the area was exposed. We found significant rot in the exterior corner of the house. The deterioration had reached structural framing, and joists were also affected. The deck was also deteriorated and required repair. A compromised corner requires a different response than a cosmetic siding repair. This section of framing helps carry loads through the house, so we needed to support the structure, remove damaged material, rebuild the corner, and restore a reliable load path before closing the exterior again.
I do not judge a rot project by how normal the siding looks. If the wood feels soft or we already know there is deterioration behind it, I want to see the framing. Andrew's house is a good example of why. The most serious damage was not the part you could see from the yard.
Long-Term Water Intrusion Had Reached the Framing
Our assessment associated the damage with long-term moisture intrusion and inadequate flashing. Repeated exposure had affected the cedar exterior, deck, and framing, and the load-bearing corner had deteriorated enough to require structural reconstruction. The available project notes do not identify one specific failed flashing joint as the sole entry point, so the repair focused on restoring the affected assemblies and improving water protection throughout the rebuilt areas.
The repair therefore had to address both sides of the problem. We needed to replace wood that had already lost integrity and improve the water-management details around the rebuilt areas.
Andrew Chose to Address More Than the Original Corner
We discussed a smaller structural repair and a more comprehensive approach. Andrew was already planning around this house as his forever home. Once we were opening the exterior and rebuilding the damaged corner, he preferred to deal with the deteriorated deck and broader siding work at the same time rather than close everything up and revisit connected areas later. That decision changed the scale of the project.
The original approved estimate was $44,925.24. The final project total was $72,307.10 after the scope expanded beyond the original structural repair. The completed scope included structural framing, moisture protection, siding work, a rebuilt deck structure, a waterproof deck surface, railing, trim, and electrical details associated with the opened exterior.
We Supported the Structure Before Rebuilding the Load-Bearing Corner
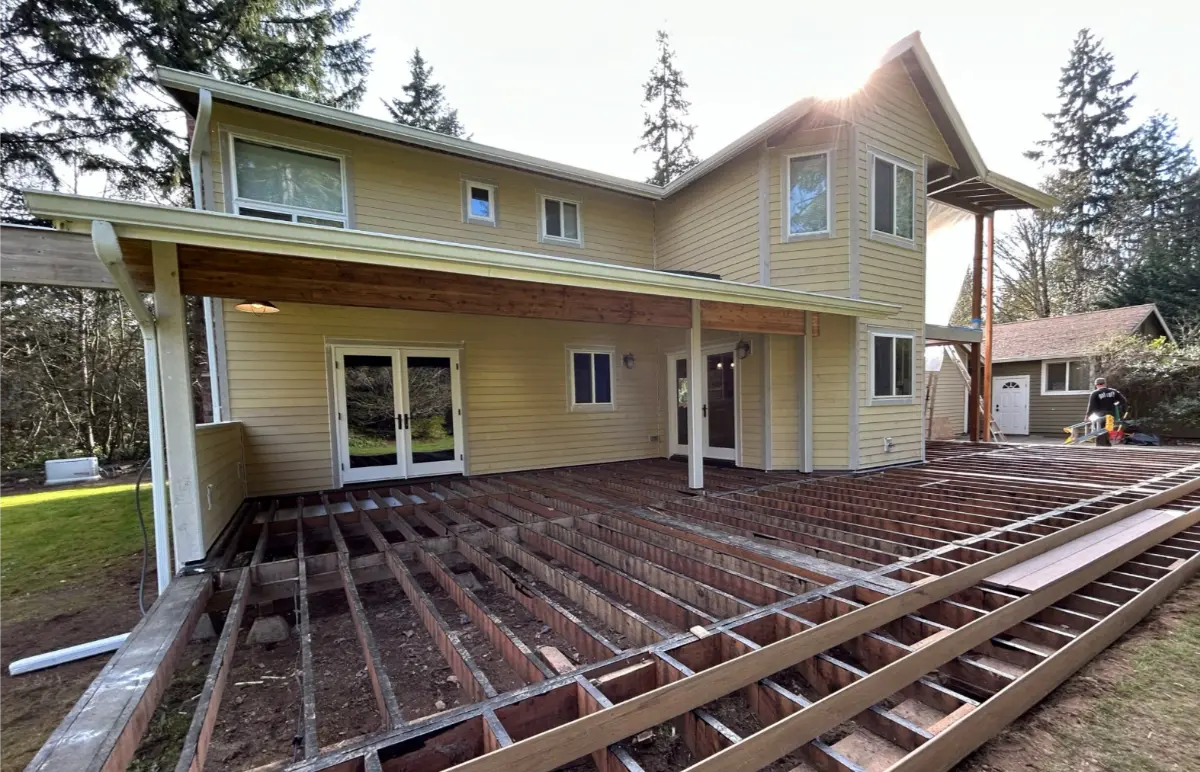
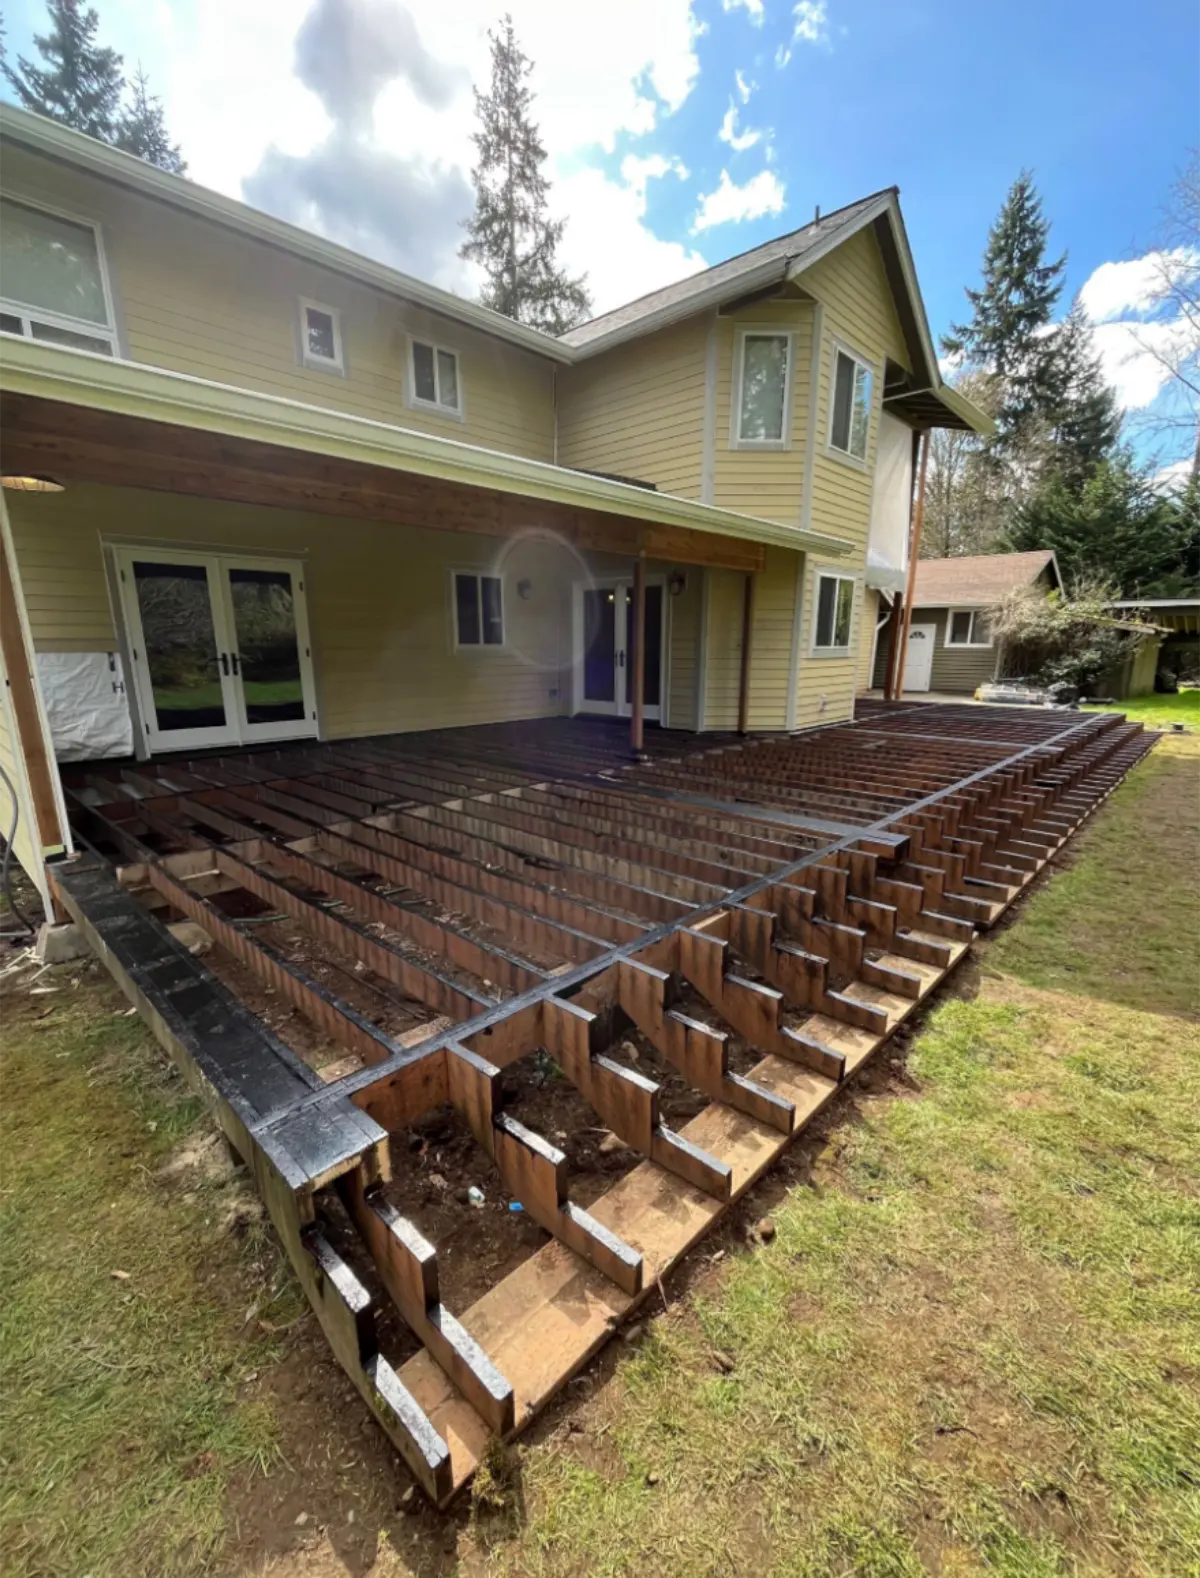
The repair system included temporary roof-support materials so loads could be controlled while compromised framing was removed. The rebuilt structure used 6x6 pressure-treated posts, a 6x8 pressure-treated beam, and 2x8 pressure-treated joists. The project used joist hangers, 6x6 post bases, structural connectors, and structural fasteners for the rebuilt deck structure. Plywood was used to restore structural surfaces as the work progressed. The material schedule included ACX plywood, while the March 24 field log specifically records CDX plywood decking on the rebuilt deck. The deck support also required new concrete footings. The specified footing size was 18 inches in diameter by 18 inches deep, with concrete and reinforcing steel.
March 12-13: We Opened the Rear Walls and Checked for Hidden Rot
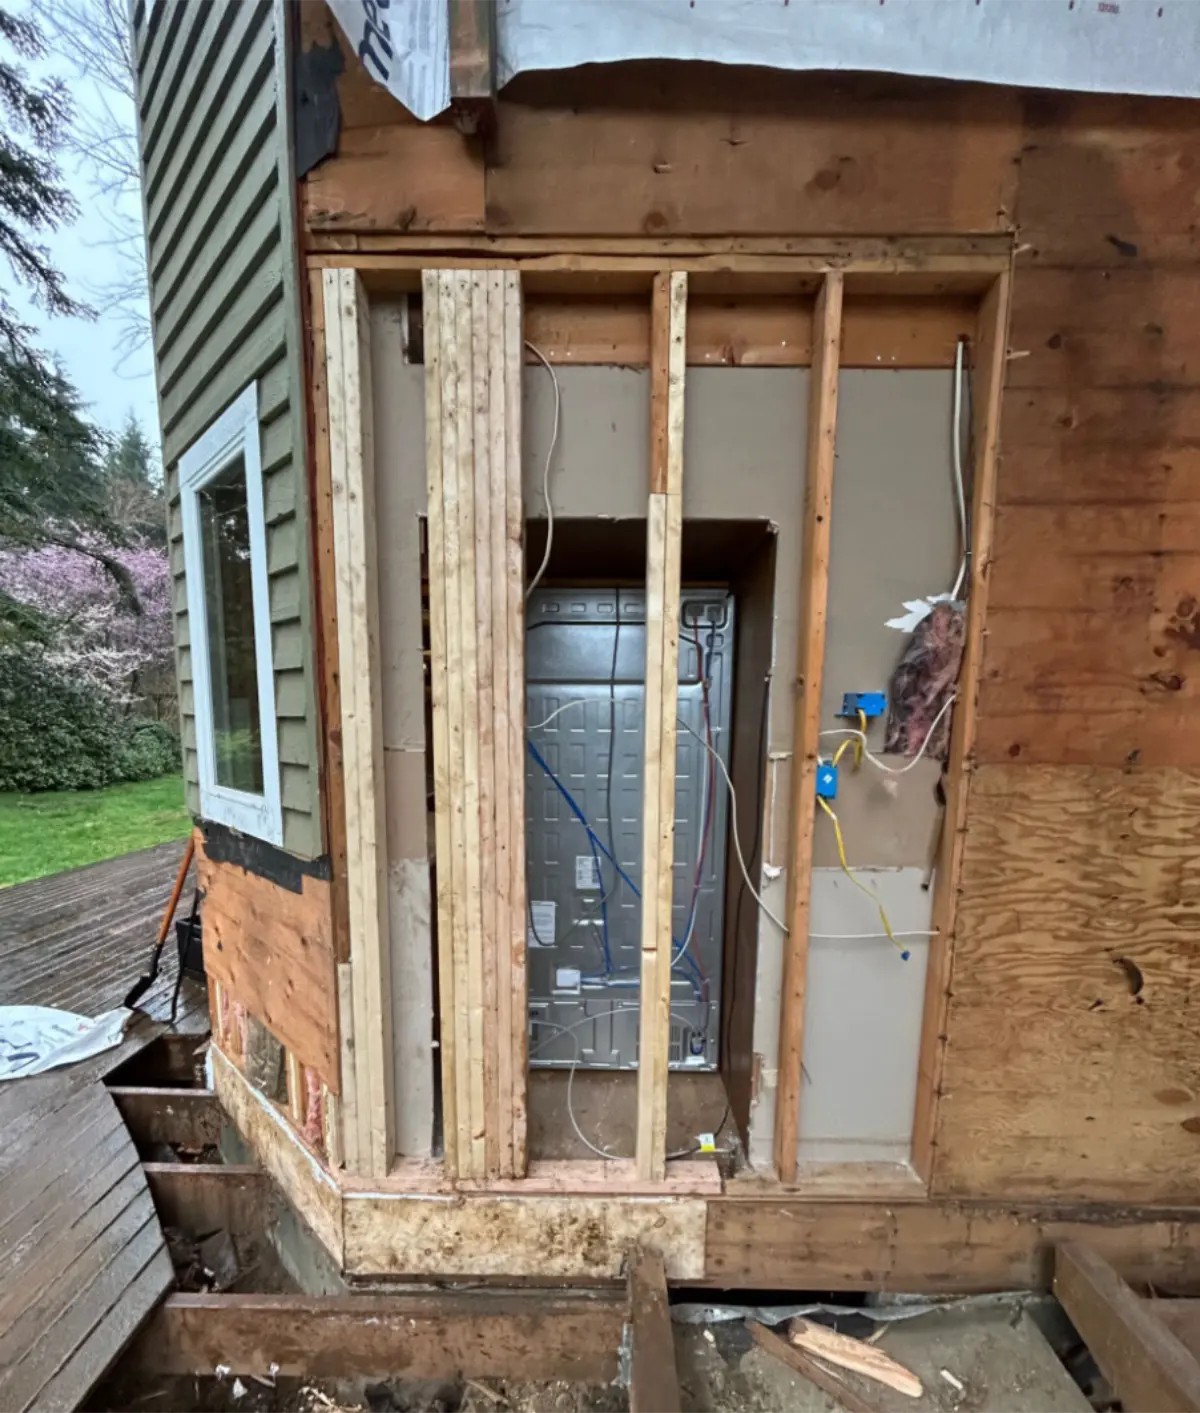
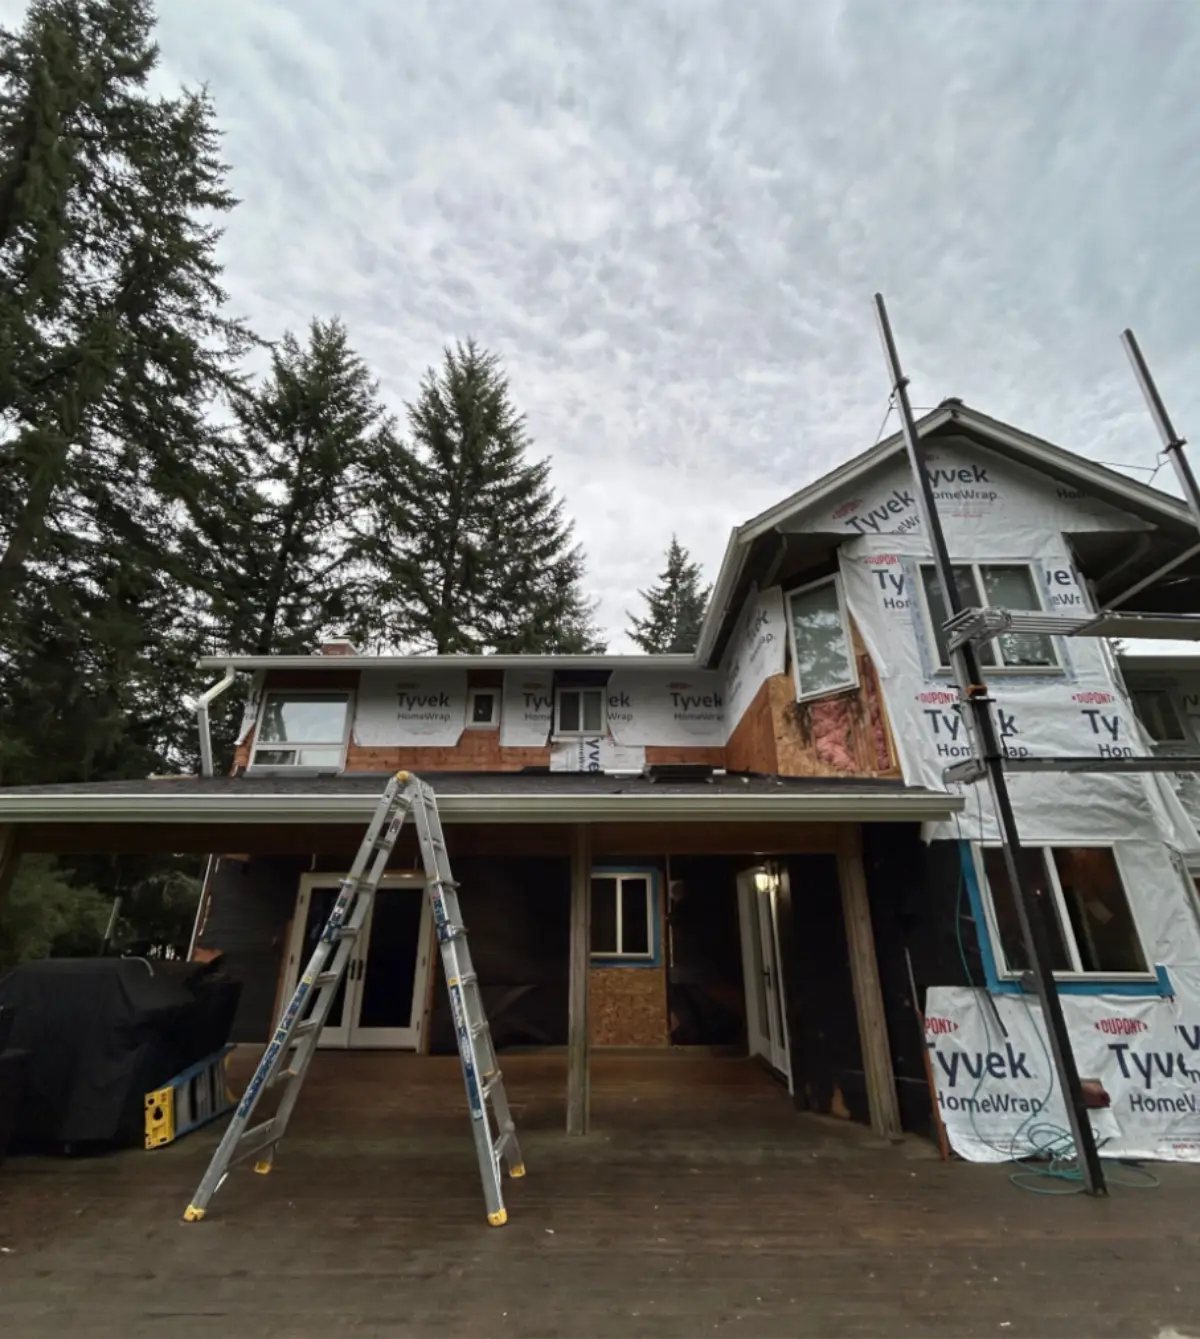
We started work at the rear of the house, removing siding and opening the affected areas as the repair progressed. The crew installed new insulation behind the refrigerator, resheeted the rotted section, and began removing siding around the bathroom and rear walls. We installed Tyvek over exposed sections as work progressed rather than leaving opened construction unprotected.
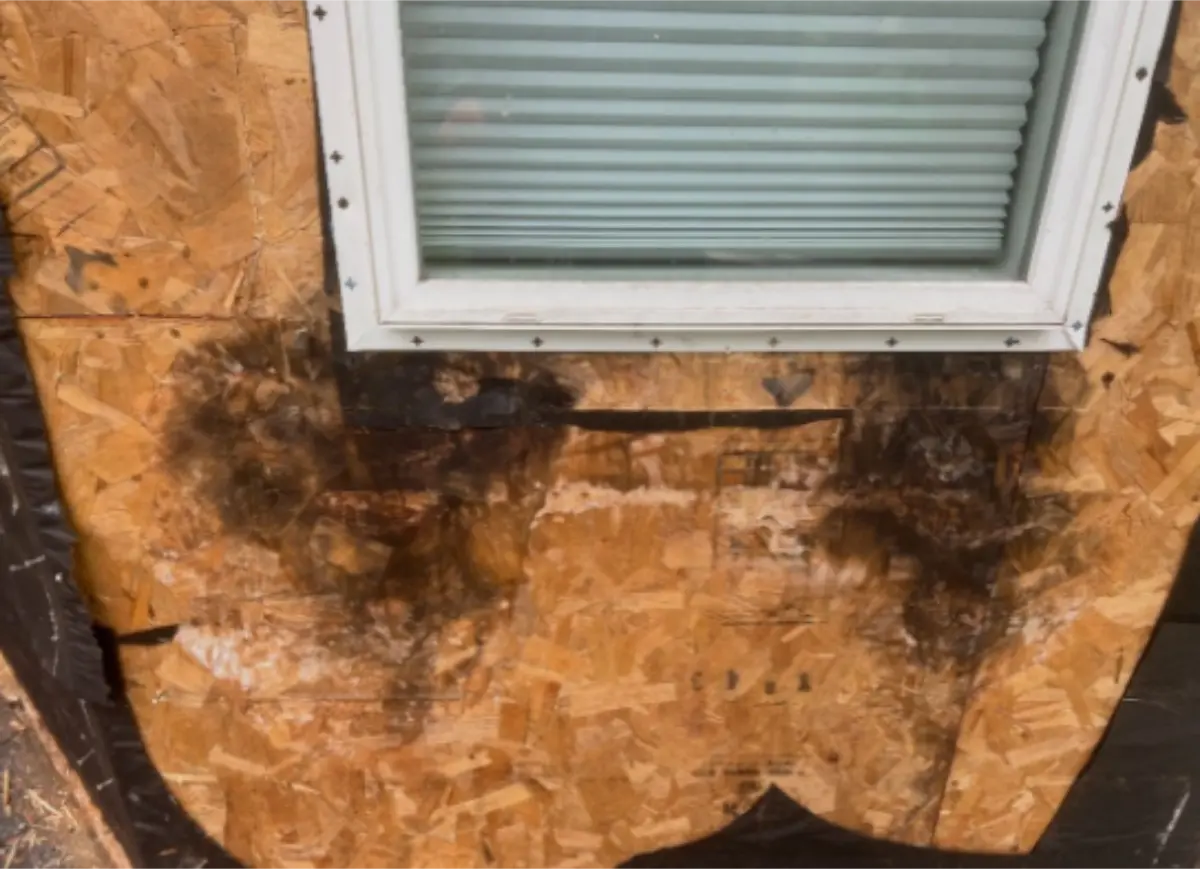
On March 13, we completed demolition in the planned rear areas and opened the plywood beneath the second-floor windows to check for concealed deterioration. We also installed roofing flashing and made new plywood cutouts around the electrical and light box behind the refrigerator. The inspection below the windows was important because the exterior had not shown the full extent of the problem. Opening the wall gave us access to framing that could not be evaluated reliably through the siding.
March 16-18: We Replaced Rotted Framing and Rebuilt the Weather Barrier
The opened wall revealed additional rot below a window. We removed the damaged material on March 16 and replaced the affected 2x4 framing and plywood. New Tyvek went over the upper section of the house before we began rebuilding the exterior finish. Over the next two days, we wrapped the entire rear wall, waterproofed the window openings, and installed Hardie corners and window trim. We also trimmed the windows and doors around the deck and installed W-flashing at the required transitions. The order mattered. We rebuilt the framing first, restored the sheathing, and then created a continuous weather-resistant layer before covering the wall with siding.
March 19-24: We Finished the Rear Siding and Rebuilt the Deck Structure
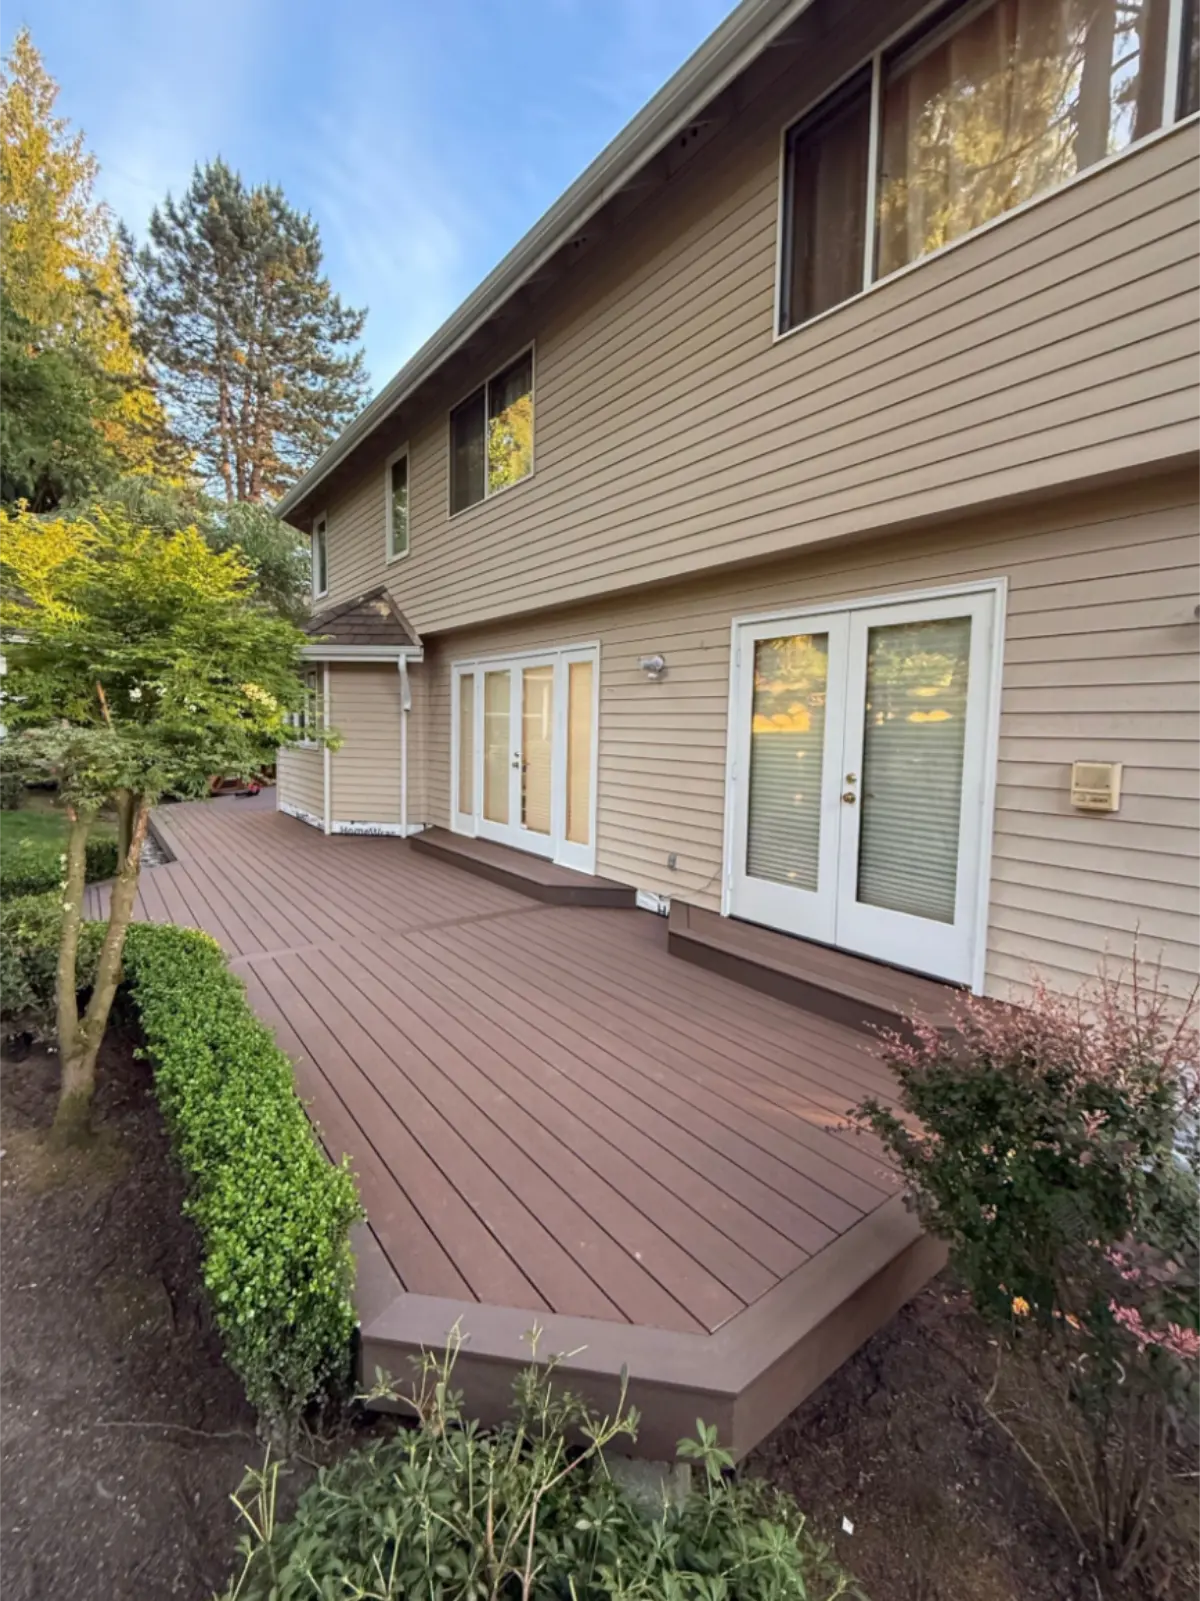
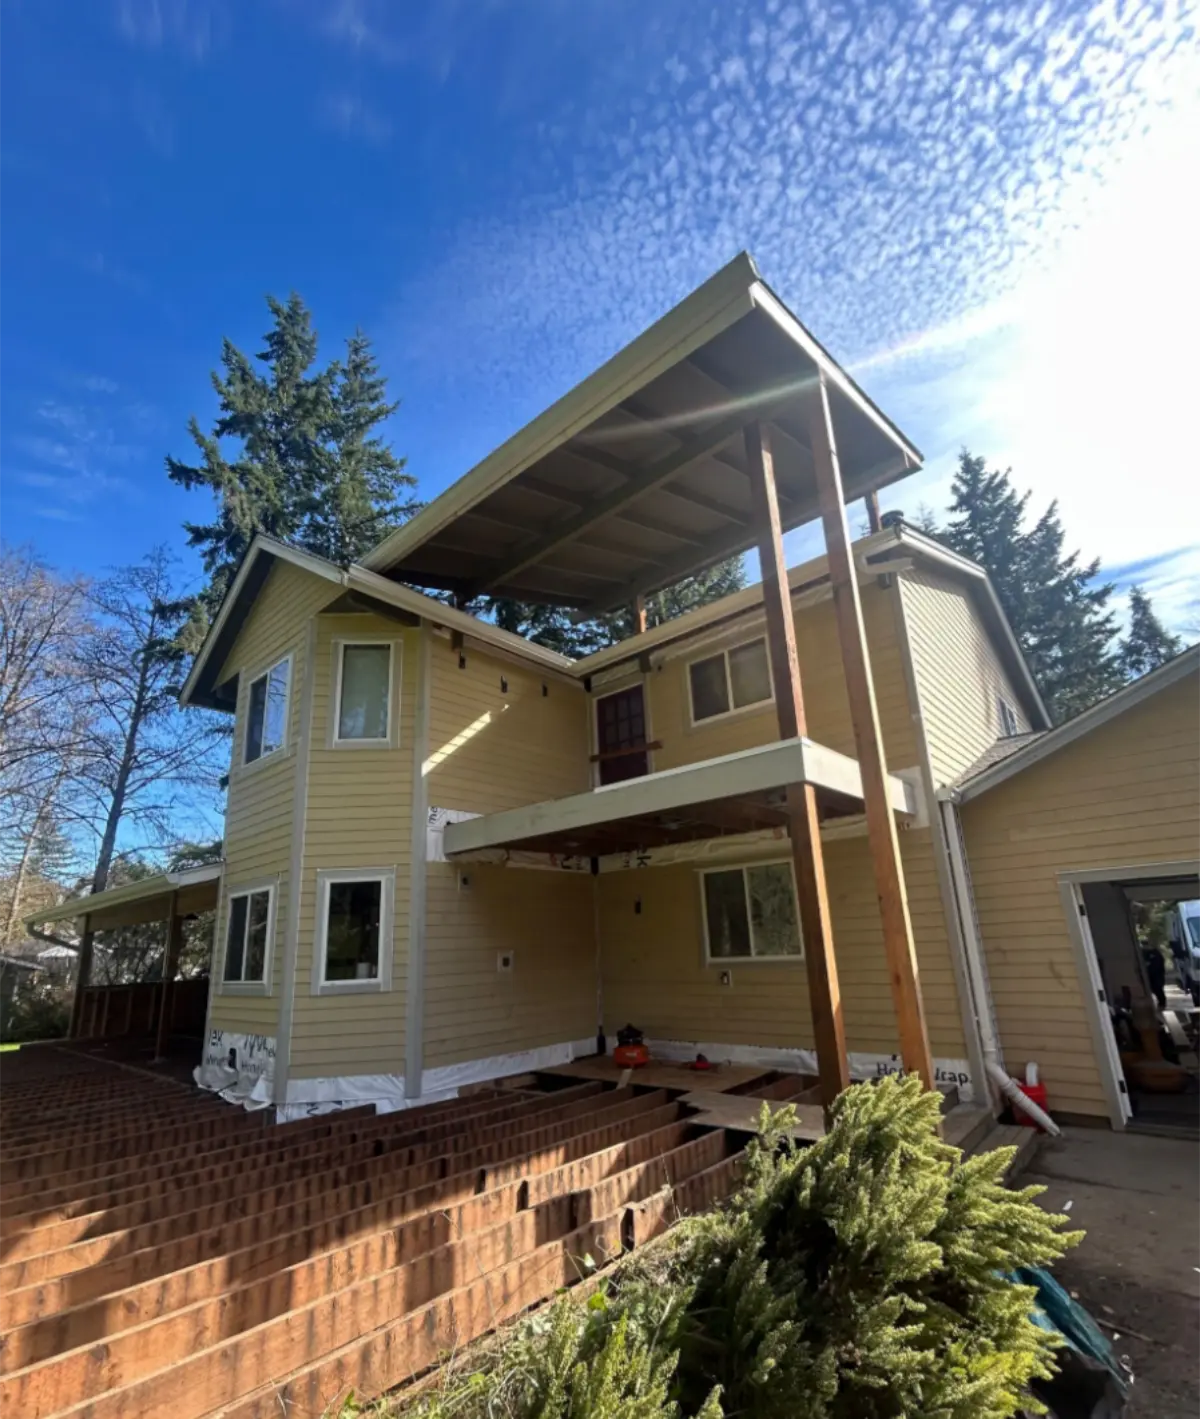
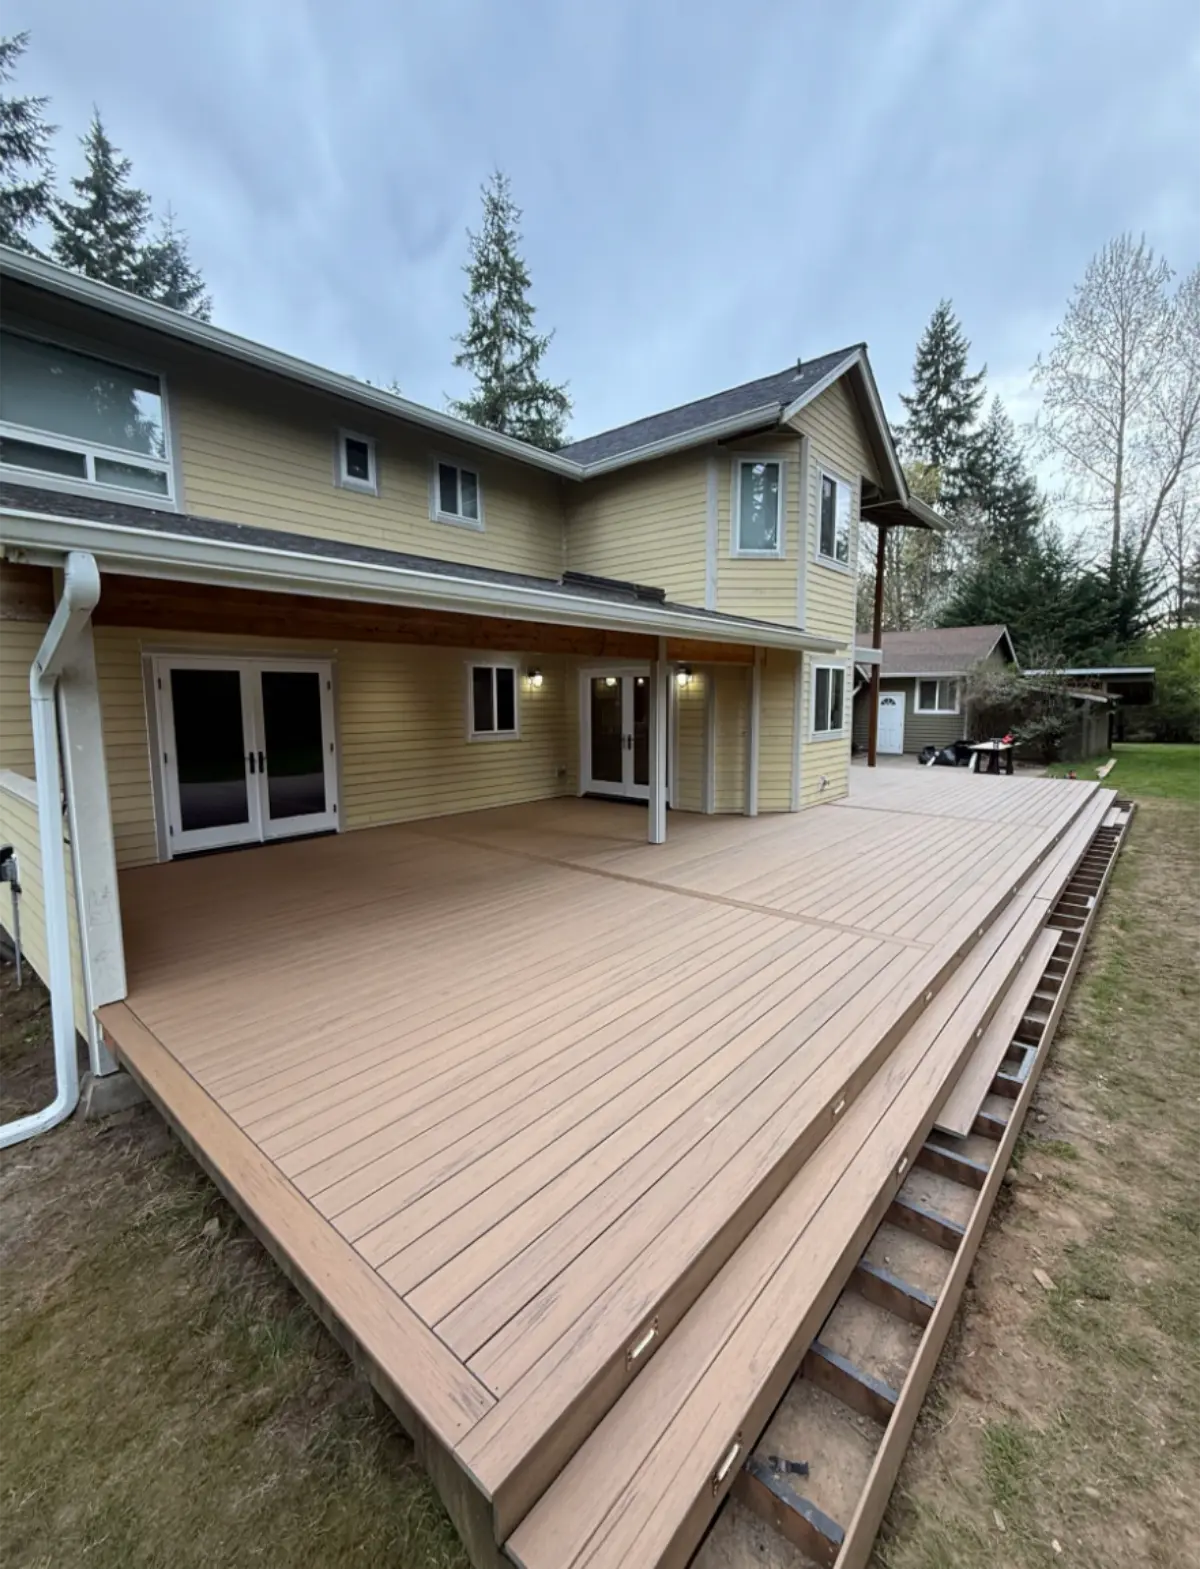
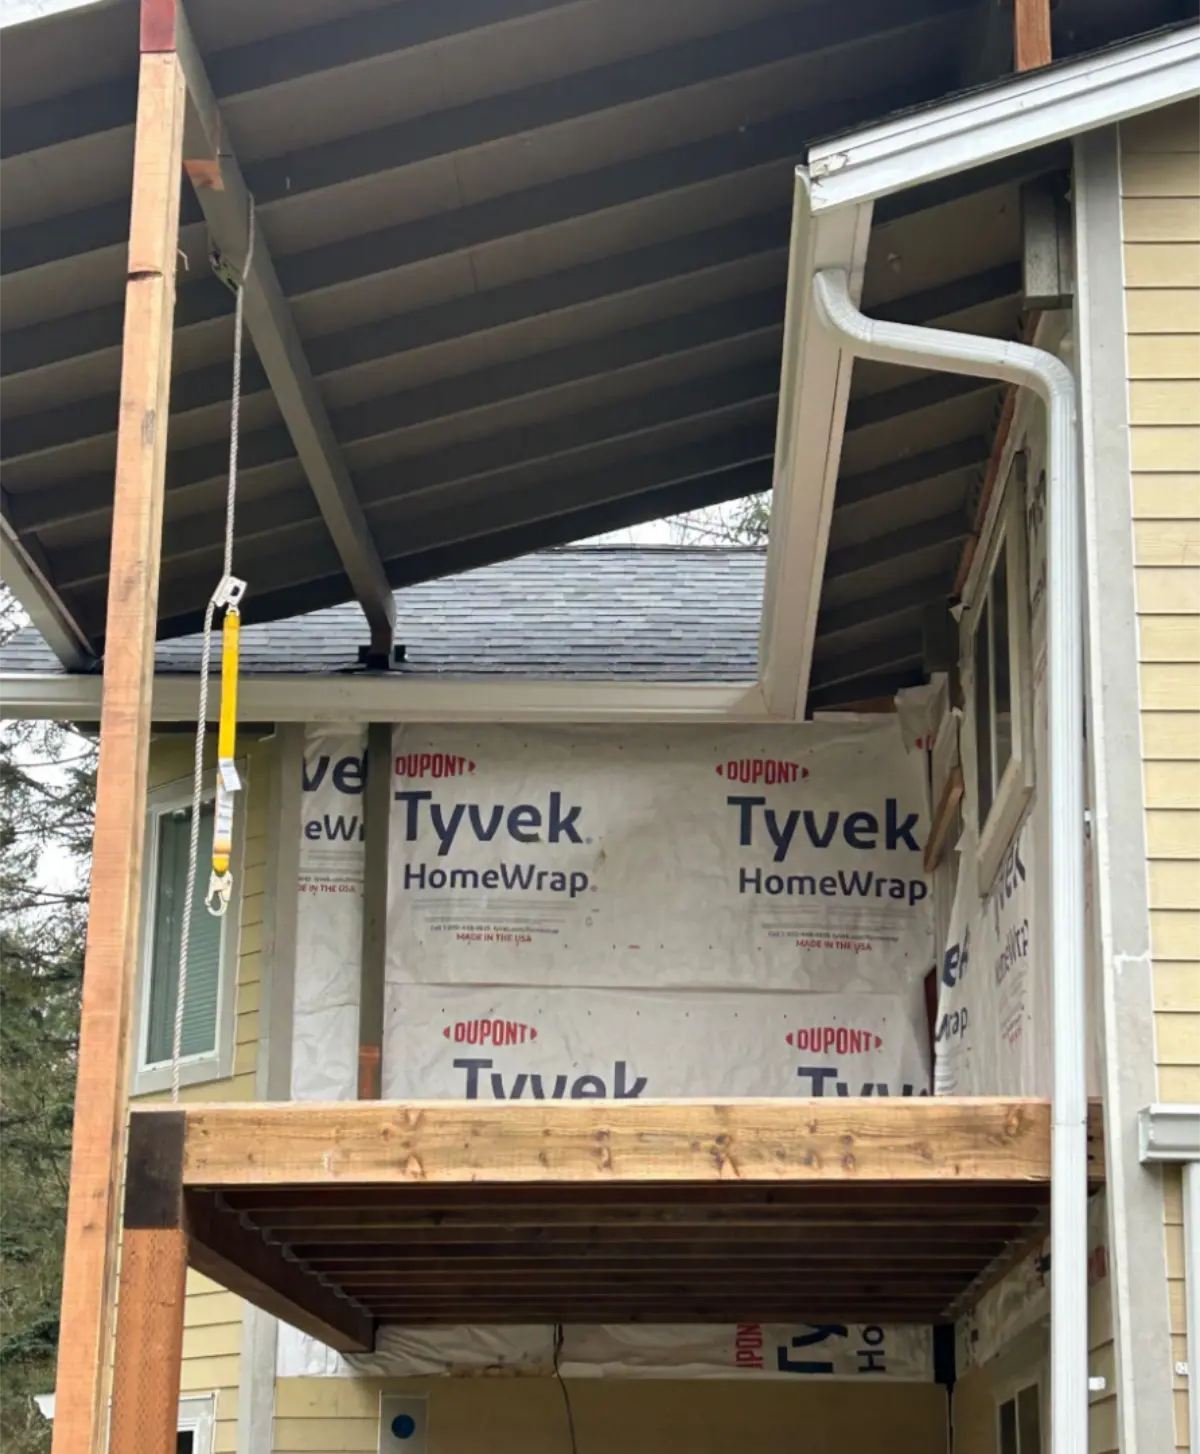
The rear first-floor siding was completed on March 19 while we began laying out the new deck support system. The existing deck deterioration required more than new surface boards. We excavated for the new footing locations, established the structural post positions, and installed the deck ledger on March 20. The new deck support system used 6x6 pressure-treated posts, a 6x8 pressure-treated beam, and 2x8 pressure-treated joists with structural connectors and joist hangers. The footing system called for concrete and rebar with 18-inch-diameter by 18-inch-deep footings where specified. We framed the pony wall and installed the bracket for the 6x6 post connection on March 23. By March 24, the main deck framing was complete and we installed CDX plywood decking over the rebuilt structure. The project had now moved well beyond the original corner rot. We were rebuilding the structural relationship between the exterior wall and deck rather than attaching new finishes to deteriorated framing.
March 25-27: We Closed the Deck Structure and Prepared It for Waterproofing
We installed the new 6x6 structural post and vent blocks on March 25 while siding continued around the deck. The following day, Hardie fascia went onto the deck edge. We installed the soffit components, sheathed the pony wall with plywood, added 2x2 framing at the siding-to-roof transitions, and completed the joist-hanger connections. We finished the siding below the deck and the remaining soffit work on March 27. The pony wall received plywood and Tyvek before we prepared the deck surface for its waterproof coating system. Waterproofing began only after the framing, plywood substrate, and surrounding exterior details were ready to receive it.
March 30-April 3: We Waterproofed the Deck and Finished the Exterior
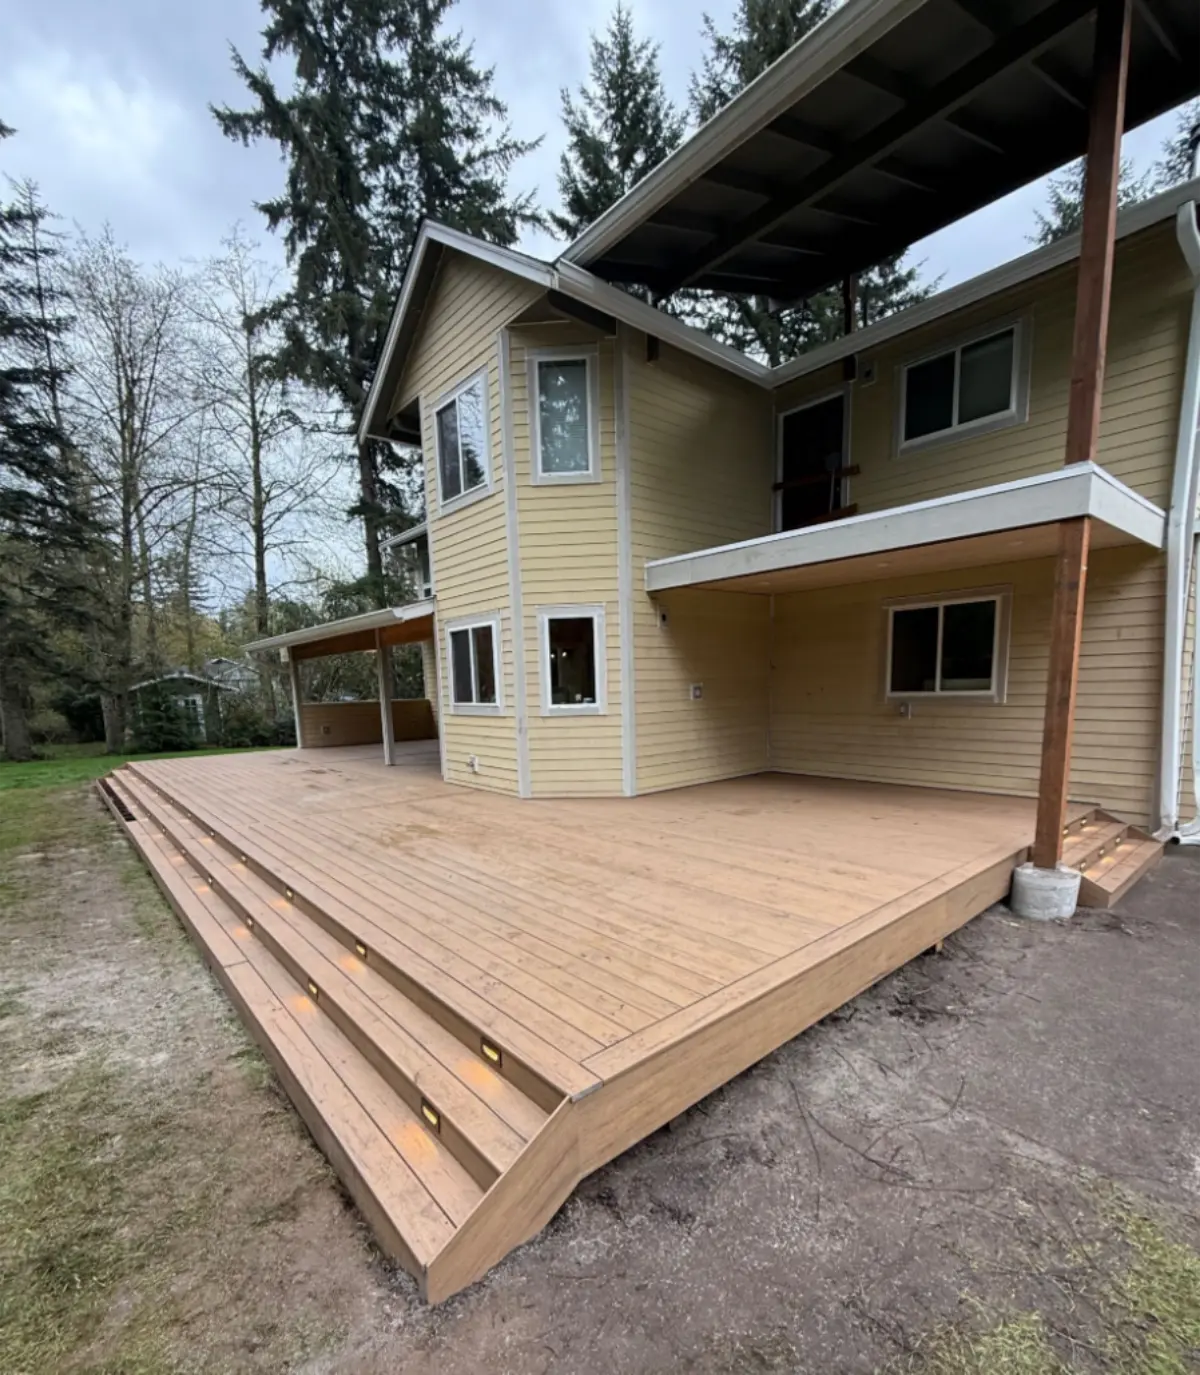
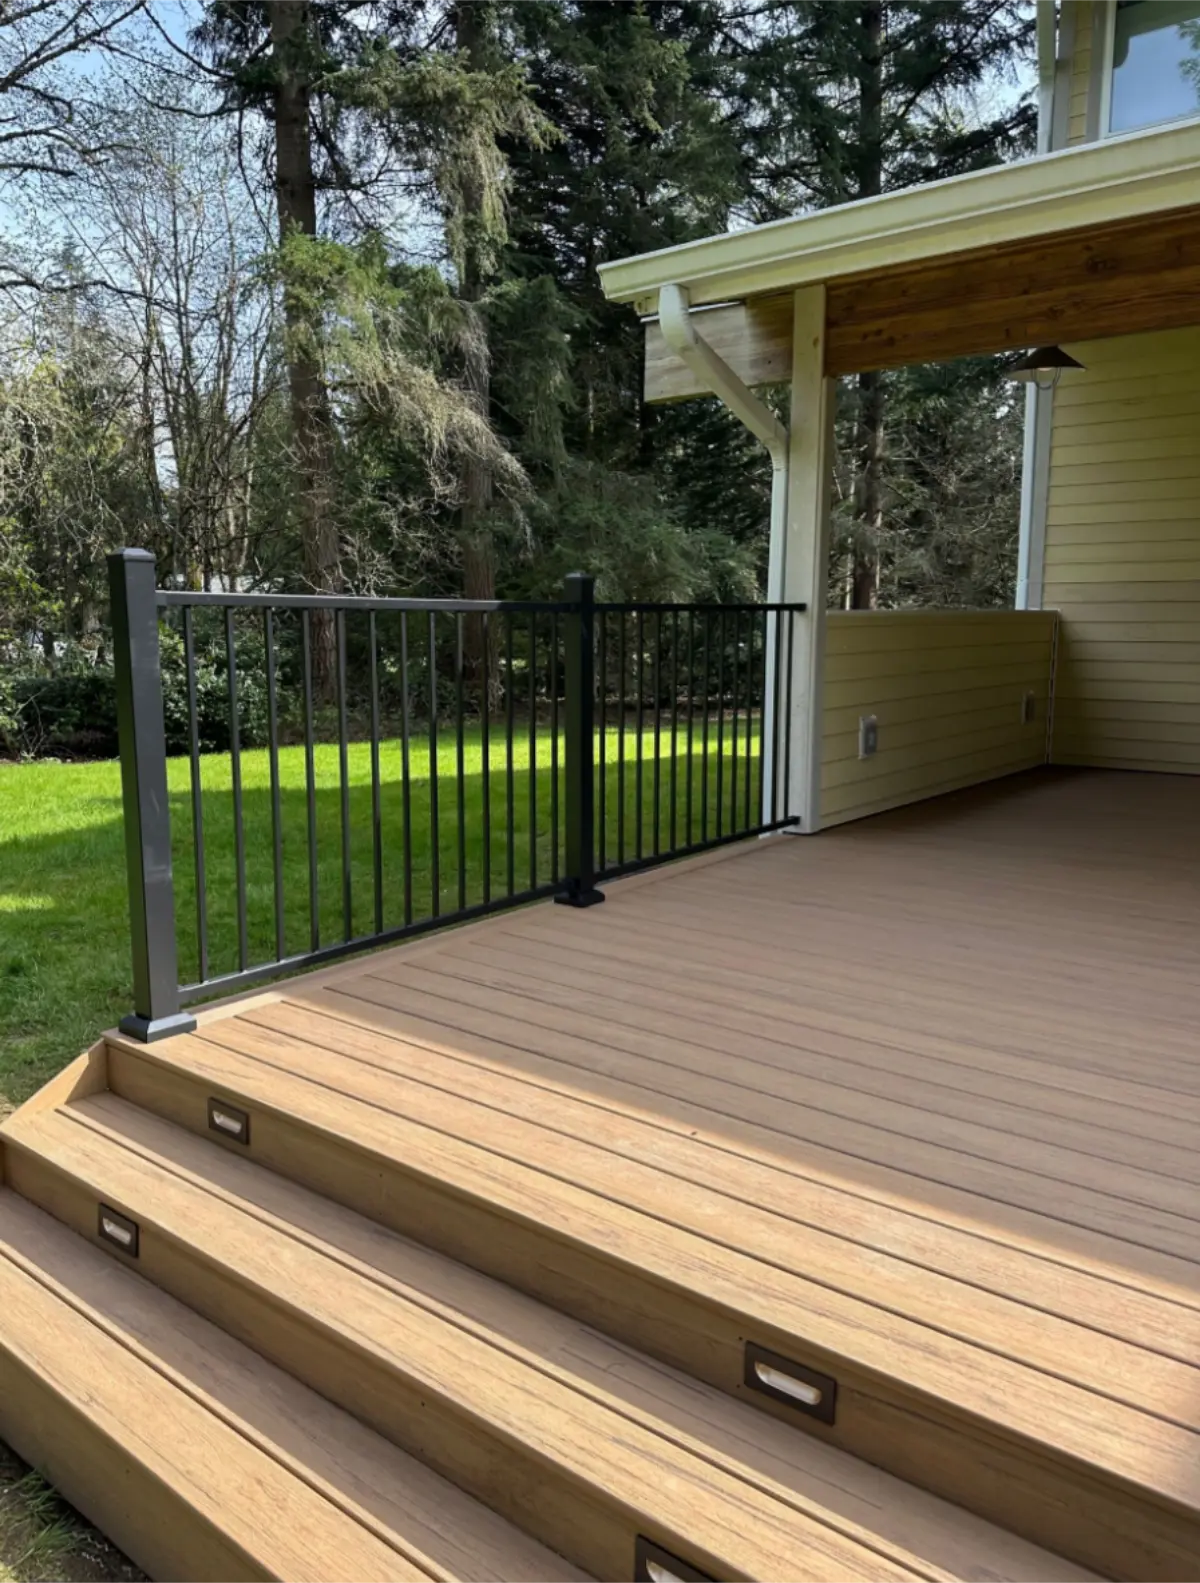
We completed the main siding work by March 30 and applied the first coat of the deck's polyurethane waterproofing system. The deck was sanded the next day to prepare the surface for the following layer. We also installed exterior outlet covers and corrected several details that could affect water movement around the deck. Projecting roof beams were cut flush where they could direct runoff toward the deck, and the opening above the soffit was closed. The second deck coat went on April 1. We also installed L-flashing and continued the remaining siding work. Deck flashing was added on April 2 so the siding and waterproof surface could meet correctly. We built up the coating system with additional polyurethane coating and sand, completed the remaining siding details, and reinstalled the downspouts. The final top coat was applied on April 3. We finished trimming the deck post, reinstalled the gutters, completed the pony-wall siding, and installed the remaining outlet boxes.
April 6-12: We Completed the Siding, Flashing, and Final Details
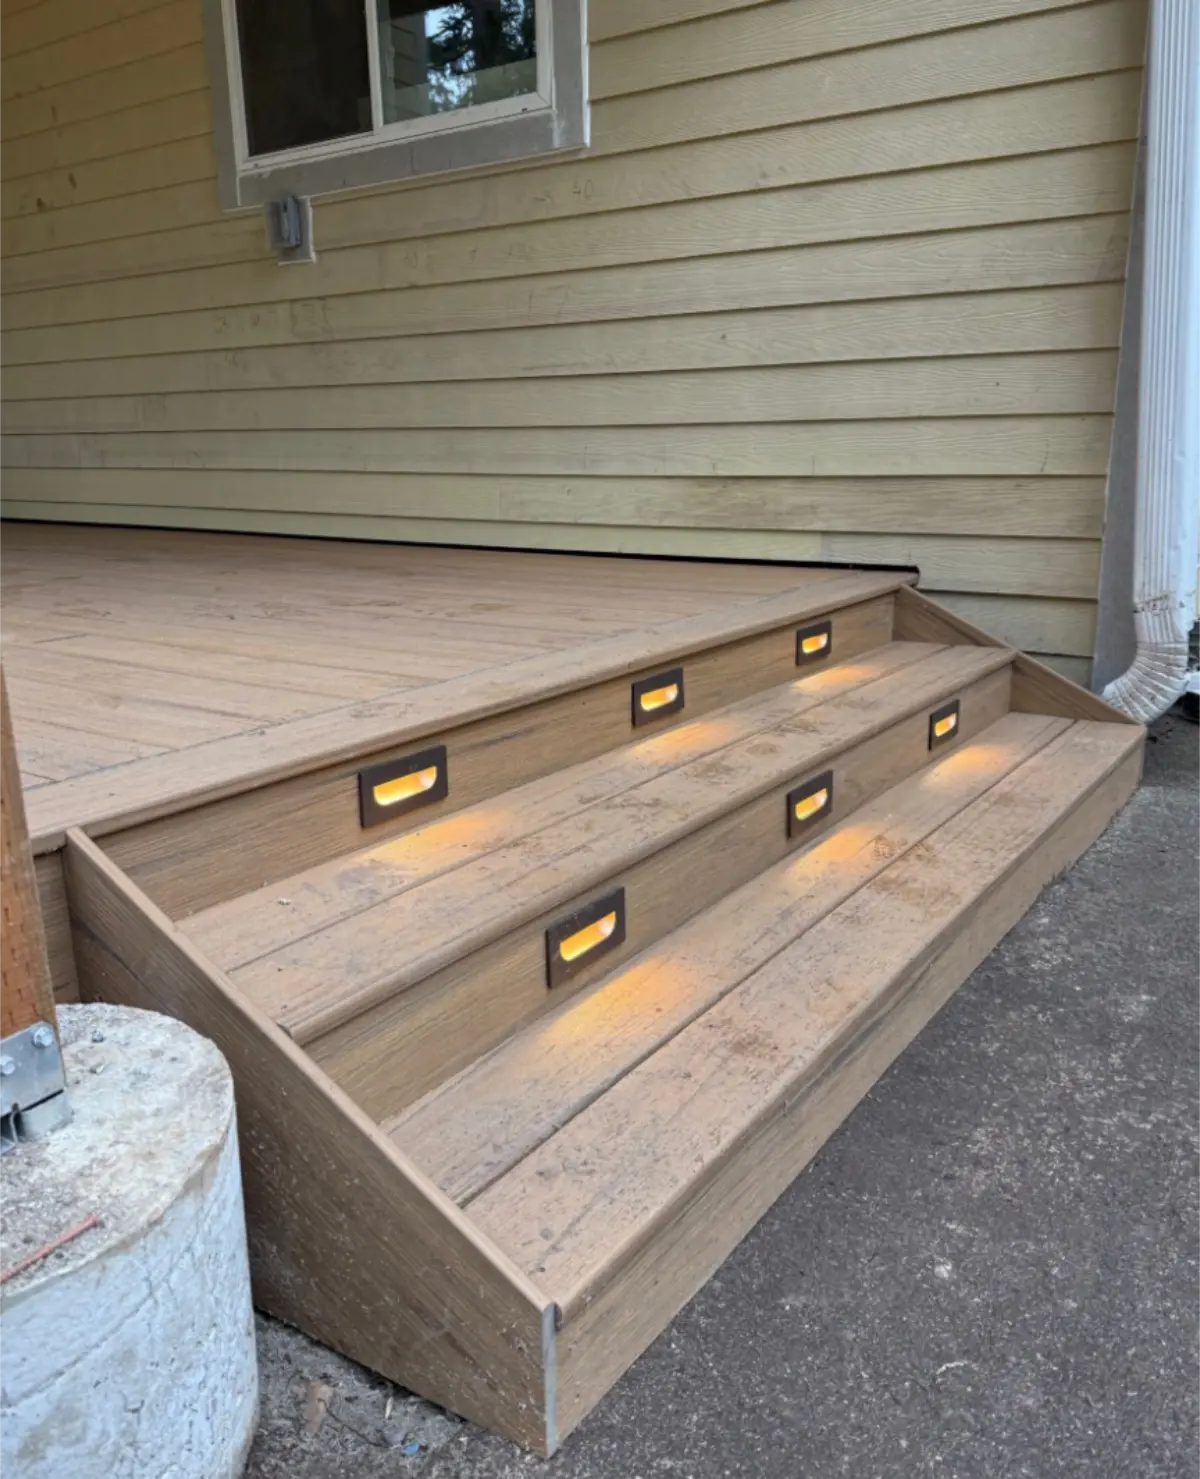
The last exterior details were completed on April 6. We finished the siding around the deck, caulked the new work, corrected remaining siding details, and cleaned up the flashing around the rebuilt area. Temporary tape and the temporary structural support were removed after the permanent framing was complete. The crew also assisted with the stair treads and finished the remaining cleanup. The recorded service period continued through April 10, with final completion and customer acceptance documented on April 12, 2026.
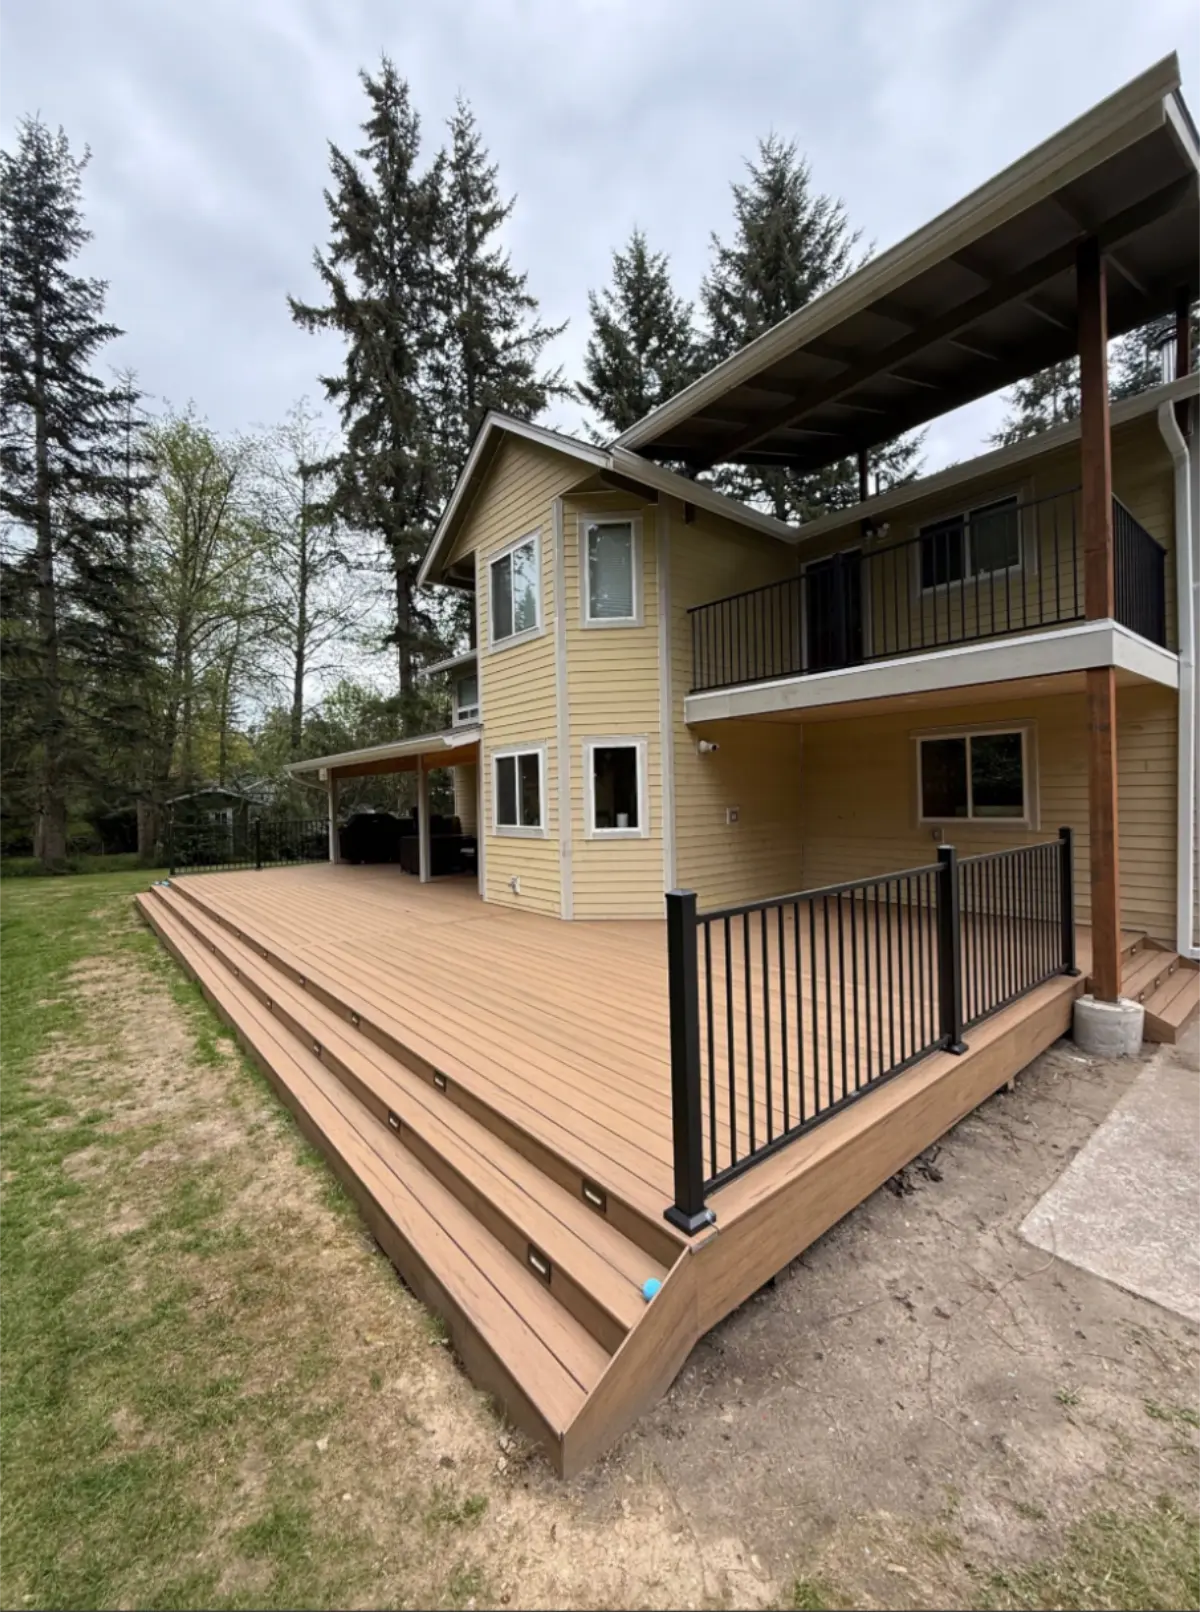
Andrew's project had started with hidden rot in one load-bearing corner. The finished work included structural framing repair, new weather protection and siding, a rebuilt pressure-treated deck structure, new concrete footings, polyurethane deck waterproofing, exterior trim, railing work, and electrical details integrated into the reconstructed exterior.
What the Final $72,307.10 Project Included
The completed scope addressed the structural corner that brought Andrew to us and the larger exterior systems connected to it:
- Removed rotted structural material and rebuilt the compromised load-bearing area with new framing and structural connections.
- Installed 6x6 pressure-treated posts, a 6x8 pressure-treated beam, 2x8 pressure-treated joists, joist hangers, post bases, structural fasteners, and new plywood decking.
- Built new 18-inch-diameter by 18-inch-deep concrete footings with reinforcing steel where specified
- Replaced damaged 2x4 framing and plywood, installed Tyvek, repaired siding, and added Hardie trim and corner components.
- Installed roofing flashing, W-flashing, L-flashing, deck flashing, and weatherproofing around windows and exterior transitions.
- Applied a polyurethane system with primer, base coating, sand, top coat, sealant, and seam or fastener treatment.
- Installed new cedar posts, railing framing, cedar balusters, and exterior-rated fasteners.
- Integrated switches, wiring, conduit, lights, outlets, trim boxes, and exterior covers into the rebuilt areas.
The original approved estimate was $44,925.24. The expanded project finished at $72,307.10 and carries our 24-month workmanship warranty.
Andrew Wanted to Fix His Forever Home Once
Andrew's decision made sense to me because he planned to keep the house long term as his forever home. He could have focused only on the first section of structural rot. Instead, he chose to address the deteriorated deck and broader exterior work while we already had access to the house. The final result gave him a rebuilt load-bearing corner, a new deck structure, renewed exterior protection, and siding work tied into the corrected flashing details. He was pleased with how the finished project came together.
The most useful lesson from this Snohomish project is how little the exterior appearance initially told us. Andrew's house did not look severely damaged. The serious problem was hidden inside a structural corner. Soft exterior wood deserves attention even when the rest of the wall looks normal. Once rot reaches a load-bearing assembly, the question is no longer whether a trim board can be patched. We need to know how far the deterioration extends, what kept the wood wet, and what has to change before the wall is closed again.
GotRot handles dry rot, structural wood frame, siding, and deck repairs throughout Snohomish County and the Greater Seattle area. If you have soft siding, suspected hidden rot, or deterioration around a deck connection, request an inspection before the visible problem becomes the least important part of the repair.