


Dry rot inspection is an essential part of maintaining the structural integrity of your home or any property. If left unchecked, dry rot can cause significant damage, leading to expensive repairs. In this detailed guide, we will explore what dry rot is, how to identify it, and the steps involved in a thorough dry rot inspection. Let’s dive in!
What is Dry Rot?
Dry rot, or wood decay fungus, is a type of fungal decay often found in timber. Scientifically known as Serpula lacrymans, dry rot affects the wood by breaking down its structural components, leading to weakening and eventual collapse if untreated. Unlike other wood-destroying fungi, dry rot can spread from one piece of timber to another, causing widespread damage.
Why Dry Rot Inspection is Important
Regular dry rot inspections are crucial for ensuring the safety and durability of your property. Undetected dry rot can undermine the structural framework of your home. Addressing dry rot promptly ensures you avoid costly repairs and maintain property value over time.
Signs of Dry Rot
Before you conduct a dry rot inspection, it's essential to know the signs you're looking for. These include:
- Wood Shrinkage and Cracking: Affected wood will often shrink and appear cracked or brittle.
- Musty Smell: Dry rot produces a distinctive musty or earthy smell.
- Brown or Dark Patches: Discolored patches, often brown or black, can appear on the wood.
- Cotton-Like Growth: In humid conditions, dry rot can produce a white, cotton-like growth.
- Fruit Bodies: Mature dry rot may produce mushroom-like structures, often a rust color.
Preparing for a Dry Rot Inspection
Conducting a dry rot inspection requires careful planning and proper equipment. Here’s what you’ll need:
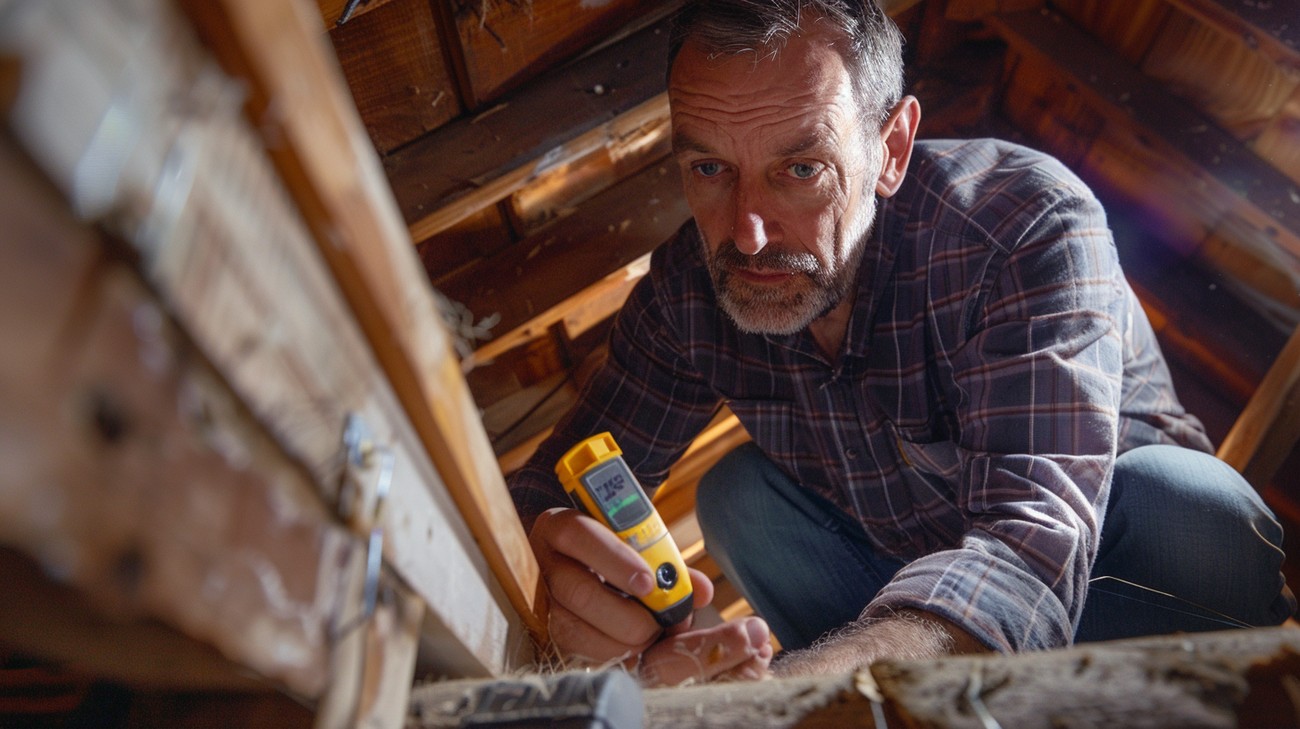
- Inspection Tools: A flashlight, moisture meter, and screwdriver.
- Protective Gear: Gloves and a dust mask to protect against mold and spores.
- Blueprints: Knowledge of your property’s structure aids in identifying vulnerable areas.
Step-by-Step Guide to Dry Rot Inspection
Initial Assessment
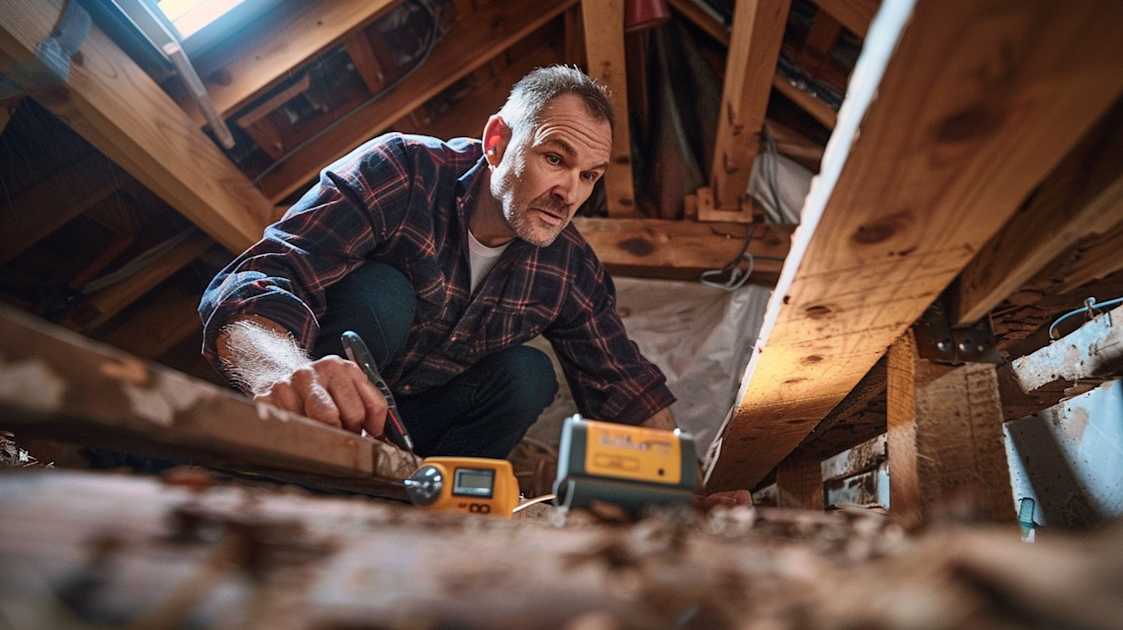
Begin with a thorough visual inspection of the property’s exterior and interior. Pay close attention to wood structures like beams, floors, and joists. Use your flashlight to spot discolored patches and your moisture meter for checking damp spots.
Investigate Problem Areas
Focus on areas with consistent exposure to moisture. Common places to inspect include:
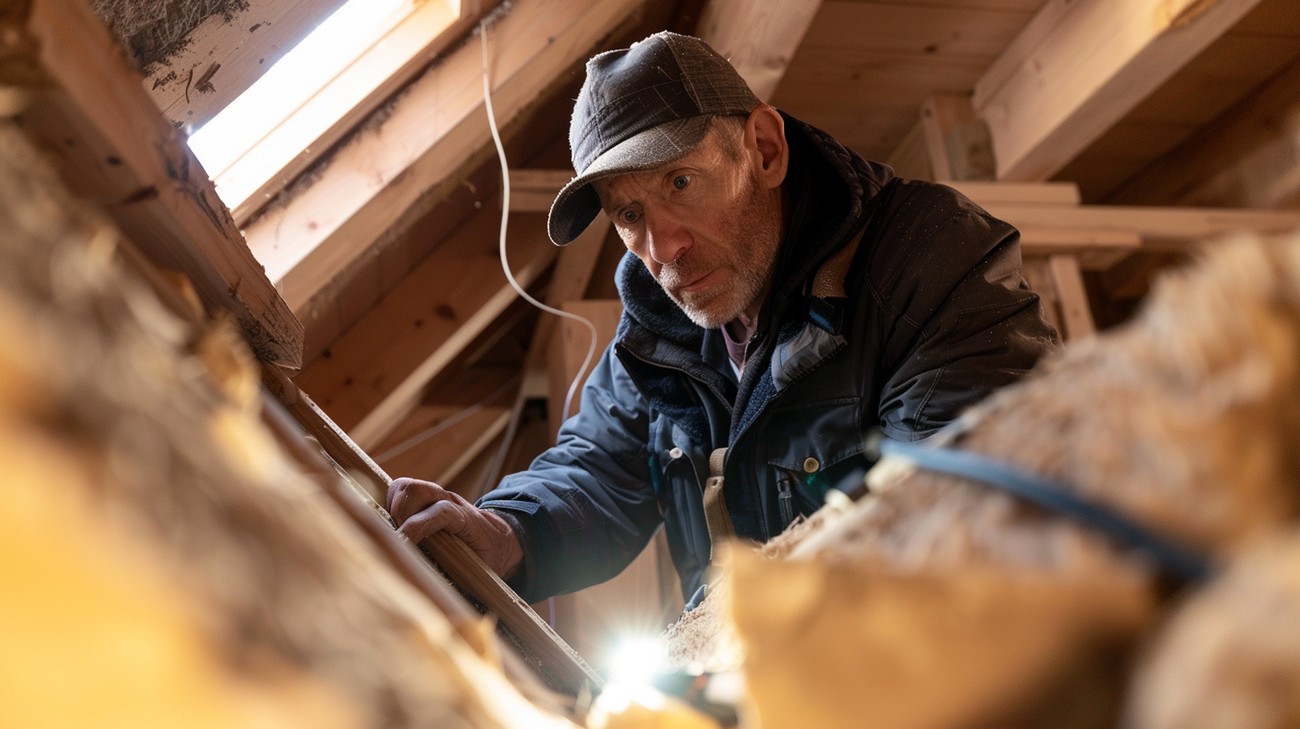
- Basements and Cellars: Usually humid and poorly ventilated, making them prime spots for dry rot.
- Roof Spaces and Attics: Inspect for leaks and proper ventilation.
- Kitchens and Bathrooms: High water usage areas prone to moisture build-up.
Detailed Inspection
Press your screwdriver into suspected areas. Soft wood is often a sign of dry rot. Use your meter to measure moisture levels. A high reading (over 20%) indicates a potential dry rot problem.
Addressing Findings
Once dry rot is identified:
- Replace Affected Timber: Remove and replace all severely affected wood to stop the spread.
- Improve Ventilation: Increase airflow in damp-prone areas to inhibit fungal growth.
- Address Moisture Issues: Fix leaks and improve drainage to lower humidity levels.
Dry Rot Prevention Tips
Preventing dry rot requires ongoing vigilance and proactive measures. Here’s a handy list to help maintain your property:
- Regular Inspections: Schedule routine checks to catch issues early.
- Humidity Control: Utilize dehumidifiers in high-risk areas.
- Proper Ventilation: Ensure adequate air circulation in enclosed areas.
- Timely Repairs: Address leaks and water issues promptly.
Professional Dry Rot Inspection Services
While DIY inspections can be effective for minor concerns, enlisting the help of professionals ensures thorough examination. Certified inspectors can accurately diagnose, suggest effective treatments, and provide peace of mind.
Dry Rot Inspection FAQ
Why is a dry rot inspection important?
Conducting a dry rot inspection is crucial because dry rot is a type of fungal decay that can significantly damage timber structures. It thrives in damp environments and, if left unchecked, can cause extensive and costly damage to wooden elements in buildings. Regular inspections help in identifying early signs of dry rot, allowing property owners to take preventive or corrective measures before the damage becomes severe. This not only helps in preserving the structural integrity of a building but also saves on potential expensive repairs in the future.
How is dry rot different from wet rot?
Dry rot and wet rot are both fungal decay forms, but they have distinct characteristics that set them apart. Dry rot is caused by a specific fungus known as Serpula Lacrymans. It requires less moisture than wet rot to thrive and can spread over non-wood materials to find new timber. Dry rot leads to more extensive damage despite needing less moisture because it can travel through brickwork or masonry. In contrast, wet rot results from various fungi types that require more moisture and tend to remain localized in intensely damp areas. A dry rot inspection involves identifying these spread patterns to implement effective treatment plans.
How often should I have my property inspected for dry rot?
The frequency of dry rot inspections largely depends on the climate and condition of your property. For example, if you live in an area with high humidity or frequent rainfall, or if your property has a history of dampness or poor ventilation, annual inspections are recommended. However, for most properties without any concerning factors, a dry rot inspection every two to three years could suffice. Regular checks help in early detection, thereby minimizing damage and repair costs.
What should I expect during a dry rot inspection?
During a dry rot inspection, a qualified professional will thoroughly examine your property for signs of dry rot fungi. They will look for telltale indicators such as cracking or shrinking wood, a musty, damp smell, or unusual growth patterns on timber. Inspectors might use tools like moisture meters and may need to lift floorboards or check behind walls if dry rot is suspected. At the end of the inspection, they will provide a detailed report of their findings along with recommendations for treatment or repair. This comprehensive approach ensures that you are well-informed of the state of your property.
Can I conduct a dry rot inspection myself?
While it might be tempting to try a DIY dry rot inspection, it's generally advisable to hire a professional. Specialists have the expertise, experience, and tools to accurately detect and diagnose dry rot, even in its early stages or hidden locations. Property owners might miss subtle signs of decay that could indicate a developing problem. Professionals also understand the safety procedures necessary to prevent the further spread of fungi during inspection. An expert assessment guarantees more reliable results and precise recommendations for remediation.
What areas of a building are most prone to dry rot?
Dry rot typically attacks areas of a building with poor ventilation and increased moisture levels. During a dry rot inspection, professionals often focus on basements, crawl spaces, attics, and anywhere timber is in contact with masonry or soil. Window sills, door frames, and roof timbers are especially vulnerable, as are areas affected by leaking pipes or roof leaks. Identifying these high-risk zones allows for targeted maintenance, reducing the likelihood of dry rot.
How can I prepare my home for a dry rot inspection?
Preparing your home for a dry rot inspection involves a few simple steps to ensure the process is smooth and effective. First, clear the areas where inspectors will examine, such as moving furniture away from walls and ensuring easy access to basements and attics. Remove any obstructions that could impede access to potential problem spots like floorboards or wall cavities. Additionally, ensure you have information about any past water damage or repairs handy, as this can give inspectors a clearer context for their investigation. Cooperation during the inspection can facilitate more thorough and efficient detection of dry rot.
What measures can be taken to prevent dry rot?
Preventing dry rot centers on controlling moisture levels and ensuring good ventilation throughout your property. Solutions such as installing a proper damp-proof course, repairing leaking pipes promptly, utilizing dehumidifiers, and ensuring adequate ventilation can significantly reduce the risk. Regular maintenance checks, including roof inspections and gutter clean-outs, help prevent water ingress. During a dry rot inspection, professionals can offer targeted prevention advice based on the specific vulnerabilities of your property, allowing you to take preemptive action to protect your investment.
Cost Breakdown
Typical Price Ranges
When diving into the world of dry rot inspection, you’ll typically find that prices can vary quite a bit. Generally, you can expect to pay between $200 and $500 for a standard inspection of an average-sized home. This is the baseline cost, which covers a comprehensive check-up by a qualified professional who will identify any areas affected by dry rot, which is essentially a type of fungus that can wreak havoc on wooden structures.
Factors That Affect Cost
Several factors can impact the overall cost of a dry rot inspection. Here’s what might influence the final bill:
Property Size: Larger homes or properties with outbuildings mean more space to inspect, equating to higher costs. For particularly large structures, costs can rise to $700 or more.
Severity and Extent: If dry rot issues are suspected to be extensive, inspectors might charge more due to the detailed work involved. They may need to spend extra time and resources, including advanced tools, to ensure a thorough inspection.
Location: Geographic location plays a significant role. In regions with a high cost of living or in particularly humid environments where dry rot is more common, prices might incline towards the higher end of the spectrum.
Inspection Methods: Advanced inspection methods, such as thermal imaging or moisture meters, can be more expensive than conventional techniques but offer a more thorough analysis.
Cost Comparison (Budget vs Premium Options)
Opting for a budget versus premium inspection service can make a dramatic difference in cost. A basic, no-frills visual inspection might be on the lower end, between $200 and $300. However, these inspections might miss subtle or hidden damage.
On the other hand, premium services, which might use cutting-edge technology like infrared scanners or hire specialists with extensive industry experience, could cost between $500 and $700. These services are often more comprehensive, providing peace of mind especially if you suspect widespread or severe infestation.
Hidden Costs to Consider
Hidden costs can sneak up on you if you’re not careful. Here are a few you should anticipate:
Follow-Up Inspections: If an inspector finds significant dry rot issues, additional inspections might be necessary after remediation to ensure the problem has been fully addressed. These inspections could easily add another $100 to $300 per visit.
Repair Estimates: While an inspection highlights the problem areas, getting estimates for repairs would be an additional cost. Some companies might offer these for free, but others might charge a consultation fee, ranging from $50 to $150.
Missed Damage: If you choose a less thorough service, there's a risk of missing hidden damage, leading to higher costs down the line when the problem worsens.
Ways to Save Money
Let’s face it: nobody wants to empty their wallet on inspections if it can be avoided. Here’s how you can save a few bucks:

Timeline & Process
Phase 1: Initial Assessment (1-2 Days)
What Happens:
The first step is to conduct a preliminary assessment. A professional inspector will visit the property to identify visible signs of dry rot, like discolored wood, damp smells, and any fungal growth.
Dependencies and Waiting Periods: This phase depends on scheduling the initial visit with an inspector. Depending on their availability, you might wait a day or two.
Preparation: Ensure easy access to all areas of your property, especially basements, attics, and crawl spaces where dry rot tends to hide. Clear any clutter that might obstruct the inspector's path. This is also a good time to gather any past reports or information about previous repairs or inspections.
Phase 2: Detailed Inspection (3-5 Days)
What Happens:
Once the initial assessment identifies potential problems areas, a more thorough inspection begins. This involves moisture measuring, wood sampling, and in some cases, removing small sections of wood for deeper examination.
Dependencies and Waiting Periods: The detailed inspection depends on the complexity of the initial findings. After booking this phase, you might wait a few days for it to commence. Make sure you discuss any urgency you might have with your inspector.
Preparation: Reconfirm access to key areas and consider making temporary living arrangements domestically for intense inspections, like when sections of flooring might be lifted. Discuss potential findings in advance, so there are no surprises.
Phase 3: Reporting and Recommendations (2-3 Days)
What Happens:
After completing the detailed inspection, the inspector will compile a comprehensive report detailing the extent of the dry rot, potential causes, vulnerable areas, and recommended remedies.
Dependencies and Waiting Periods: The preparation of the report will typically take a couple of days after the inspection. Accurate documentation relies on thorough data collection in the previous phase.
Preparation: Allocate some time for a debrief with your inspector to clarify any terms or processes you're unfamiliar with in the report. Having a list of questions prepared can help maximize the usefulness of this session.
Phase 4: Remediation Planning (1-2 Weeks)
What Happens:
Using the report’s recommendations, a remediation plan is developed. This may involve hiring contractors, purchasing materials, and scheduling repairs.
Dependencies and Waiting Periods: This phase is dependent on scheduling the appropriate contractors and procuring necessary materials. Waiting periods can fluctuate based on contractor availability and material delivery times.
Preparation: Research and contact recommended contractors immediately after receiving your report. Clearly understand each step of the proposed remediation process and assess any immediate steps like simple DIY repairs or moisture control measures you can undertake.
Phase 5: Implementing Repairs (Varies: 1 Week to Several Months)
What Happens: Professional contractors will carry out the repairs, ranging from wood replacement to improved ventilation systems to prevent future occurrences.
Dependencies and Waiting Periods: Dependencies lie in the severity of the dry rot and the complexity of the remediation plan. Larger projects may require phased work, resulting in extended timelines.
Preparation: Organize your home and schedule to accommodate repairs. Ensure contractors have full access to the necessary areas, and prepare temporary solutions for disrupted household spaces.
Final Thoughts
Regular dry rot inspection is vital for the long-term health of your home, especially in a damp climate like Seattle, WA. We're here to help you catch any issues before they escalate into costly repairs, ensuring you and your family can enjoy your space without worry. The earlier you identify potential dry rot problems, the easier and more affordable they are to fix.
If you suspect your home might be at risk or simply want peace of mind, we encourage you to reach out to us at GotRot. Our knowledgeable team specializes in dry rot inspection and is committed to serving homeowners in the Seattle area. Whether it’s a routine check or a specific concern, we’re just a call away to assist you in safeguarding your investment. Let’s work together to keep your home safe and sound!


